
You’re scrolling through social media, watching friends experience virtual reality with expensive headsets, and wondering if there’s an affordable way to join the VR revolution. The good news is you can create your own functional VR headset using materials already in your home. Learning how to make cardboard VR goggles transforms your smartphone into an immersive portal without spending hundreds on commercial equipment. This hands-on project delivers genuine 360-degree viewing capabilities through Google’s open-source Cardboard platform, proving VR doesn’t have to break the bank.
Thousands of educators, hobbyists, and tech enthusiasts have embraced DIY cardboard VR viewers as an accessible entry point to virtual reality. You’ll be amazed how effectively two simple lenses combined with precisely folded cardboard can create convincing depth perception and immersion. The best part? Building your own VR goggles takes less than an hour once you have your materials gathered, costs almost nothing, and results in a viewer that works with nearly any smartphone. Whether you want to explore virtual tours, play simple games, or watch 360° videos, this project unlocks experiences previously reserved for those with expensive gear.
In this guide, you’ll discover exactly how to make cardboard VR goggles that deliver a crisp, comfortable viewing experience. We’ll cover everything from sourcing the right lenses to troubleshooting common issues that might cause blurry vision or misalignment. By following these detailed instructions, you’ll create a sturdy viewer that rivals commercial options at a fraction of the cost. Let’s transform ordinary cardboard into your personal gateway to virtual worlds.
Essential Materials for Your DIY Cardboard VR Viewer
Finding the Right Cardboard and Lenses
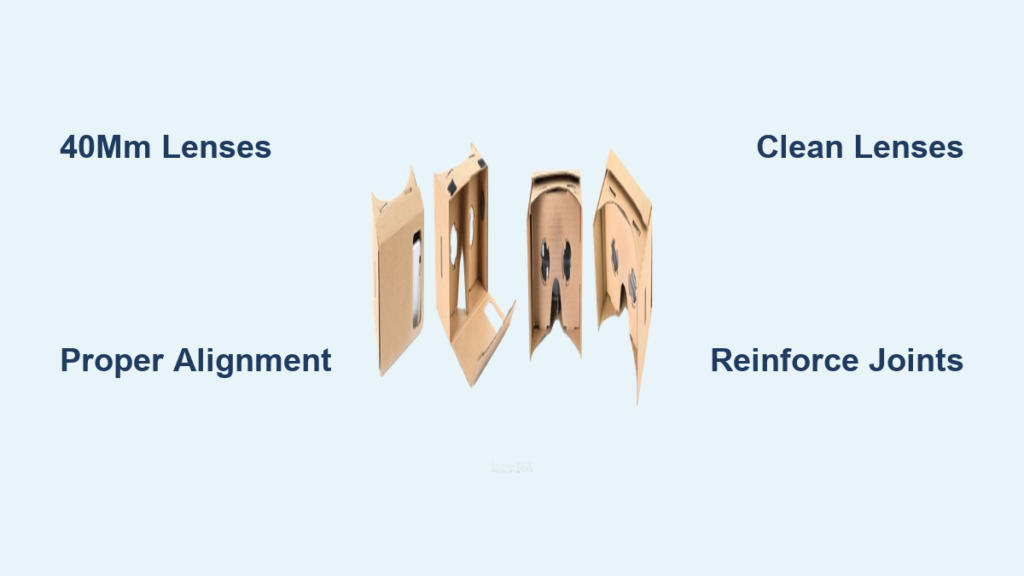
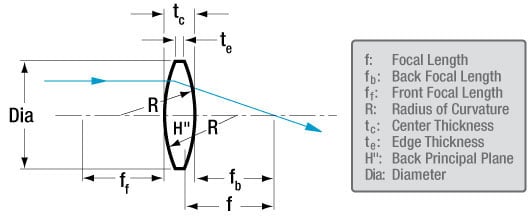
Your success hinges on selecting appropriate materials—especially the lenses. For authentic VR performance, you need precisely 40mm focal length biconvex lenses with 25mm diameter. These specific lenses create the necessary magnification and field of view for proper VR immersion. While some sellers list “45mm” lenses, these won’t provide the correct focus distance for smartphone screens. Purchase from reputable educational suppliers or VR component retailers to ensure optical quality—cheap novelty lenses often create distorted images that ruin the VR effect.
The cardboard itself matters more than you might think. Standard corrugated cardboard from shipping boxes works, but for best results use 1.5-2.0mm thick mounting board which maintains its shape better. If printing Google’s official template, use heavyweight cardstock (at least 110lb) that won’t buckle during assembly. Avoid glossy or coated cardboard as it creates internal reflections that degrade image quality. For the frame structure, consider reinforcing critical joints with thin strips of balsa wood if you want maximum durability—this simple upgrade prevents the common problem of viewers that collapse after initial use.
Critical Tools for Precision Assembly
Skip the office scissors—proper tools make the difference between a shaky viewer and a rock-solid VR experience. You need a fresh X-Acto knife blade for clean cuts through cardboard layers. Pair this with a metal ruler (not plastic) to prevent blade slippage and a self-healing cutting mat to protect your work surface. When scoring fold lines, use a dull butter knife or empty ballpoint pen to create precise creases without cutting through the cardboard. This scoring technique ensures crisp 90-degree angles that align the lenses perfectly with your eyes.
For assembly, a hot glue gun is essential—its quick setting time prevents parts from shifting during construction. Use low-temperature glue sticks to avoid warping delicate cardboard. Keep a small container of isopropyl alcohol and microfiber cloths nearby to clean lenses before installation; even invisible fingerprints cause significant distortion in VR. Don’t forget a digital caliper if you have one—measuring lens positioning to within 1mm makes the difference between comfortable viewing and eye strain.
Precision Assembly: Building Your Cardboard VR Goggles Step by Step
Cutting and Scoring Your Cardboard Template
Begin by printing Google’s official Cardboard V2 template on heavyweight paper or directly onto your mounting board. When cutting out pieces, place your metal ruler firmly against the line and pull the X-Acto knife toward you in multiple light passes rather than one heavy cut—this prevents ragged edges that compromise structural integrity. For inside curves and small details, rotate the cardboard rather than the knife for better control.
Scoring requires equal precision: place your metal ruler along fold lines and run a blunt tool with medium pressure (about 2-3 pounds of force) three times along each line. Test your scoring technique on scrap cardboard first—you’ve scored correctly when the cardboard folds neatly at 90 degrees without cracking. Pay special attention to lens cutouts; rough edges here create visible distortions in your VR view. After cutting all pieces, gently sand any rough edges with fine-grit sandpaper for professional results.
Perfect Lens Installation for Clear VR Viewing
Installing the lenses correctly makes or breaks your VR experience. Place each 40mm lens into its frame with the convex side facing outward—this orientation provides maximum field of view. To verify correct positioning, hold the lens at eye level; you should see a magnified reflection of your face when looking through the convex side. Secure lenses using thin strips of double-sided tape around the edges rather than covering the optical surface.
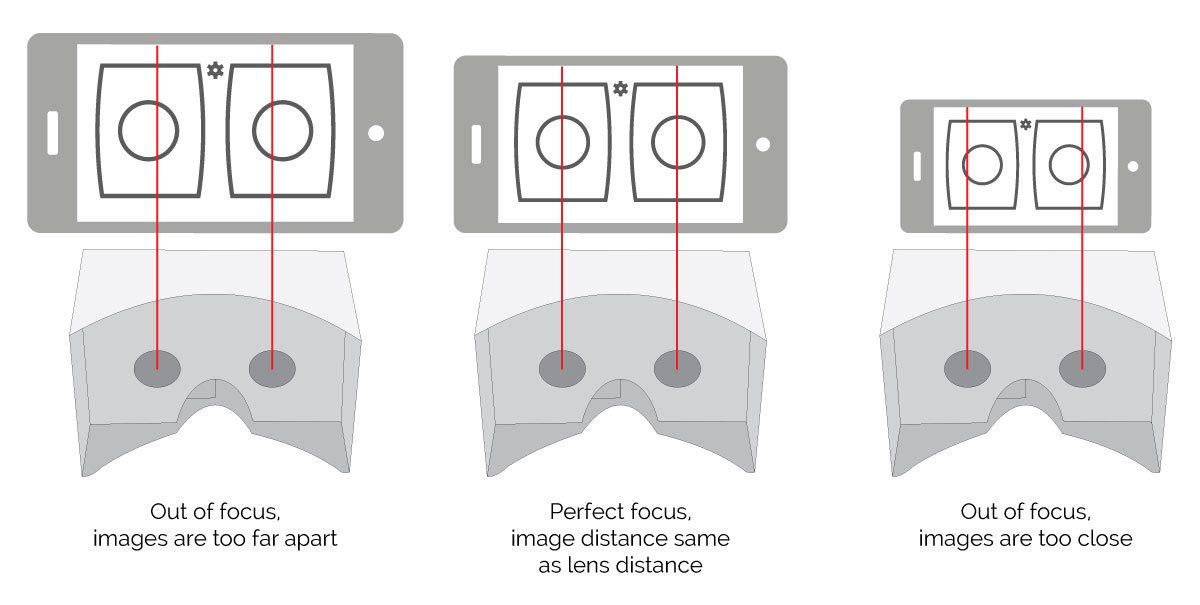
Position the lenses exactly 62mm apart for average adult interpupillary distance (IPD), but consider making the lens frames slightly adjustable by adding small slots instead of fixed holes. This lets you fine-tune the distance later if you experience double vision. Before final assembly, test the lens alignment by looking through them at a detailed image—you should see a single, clear picture without distortion at the edges. If you notice blurriness, the lenses may be dirty or incorrectly oriented.
Phone Compartment Construction and Alignment
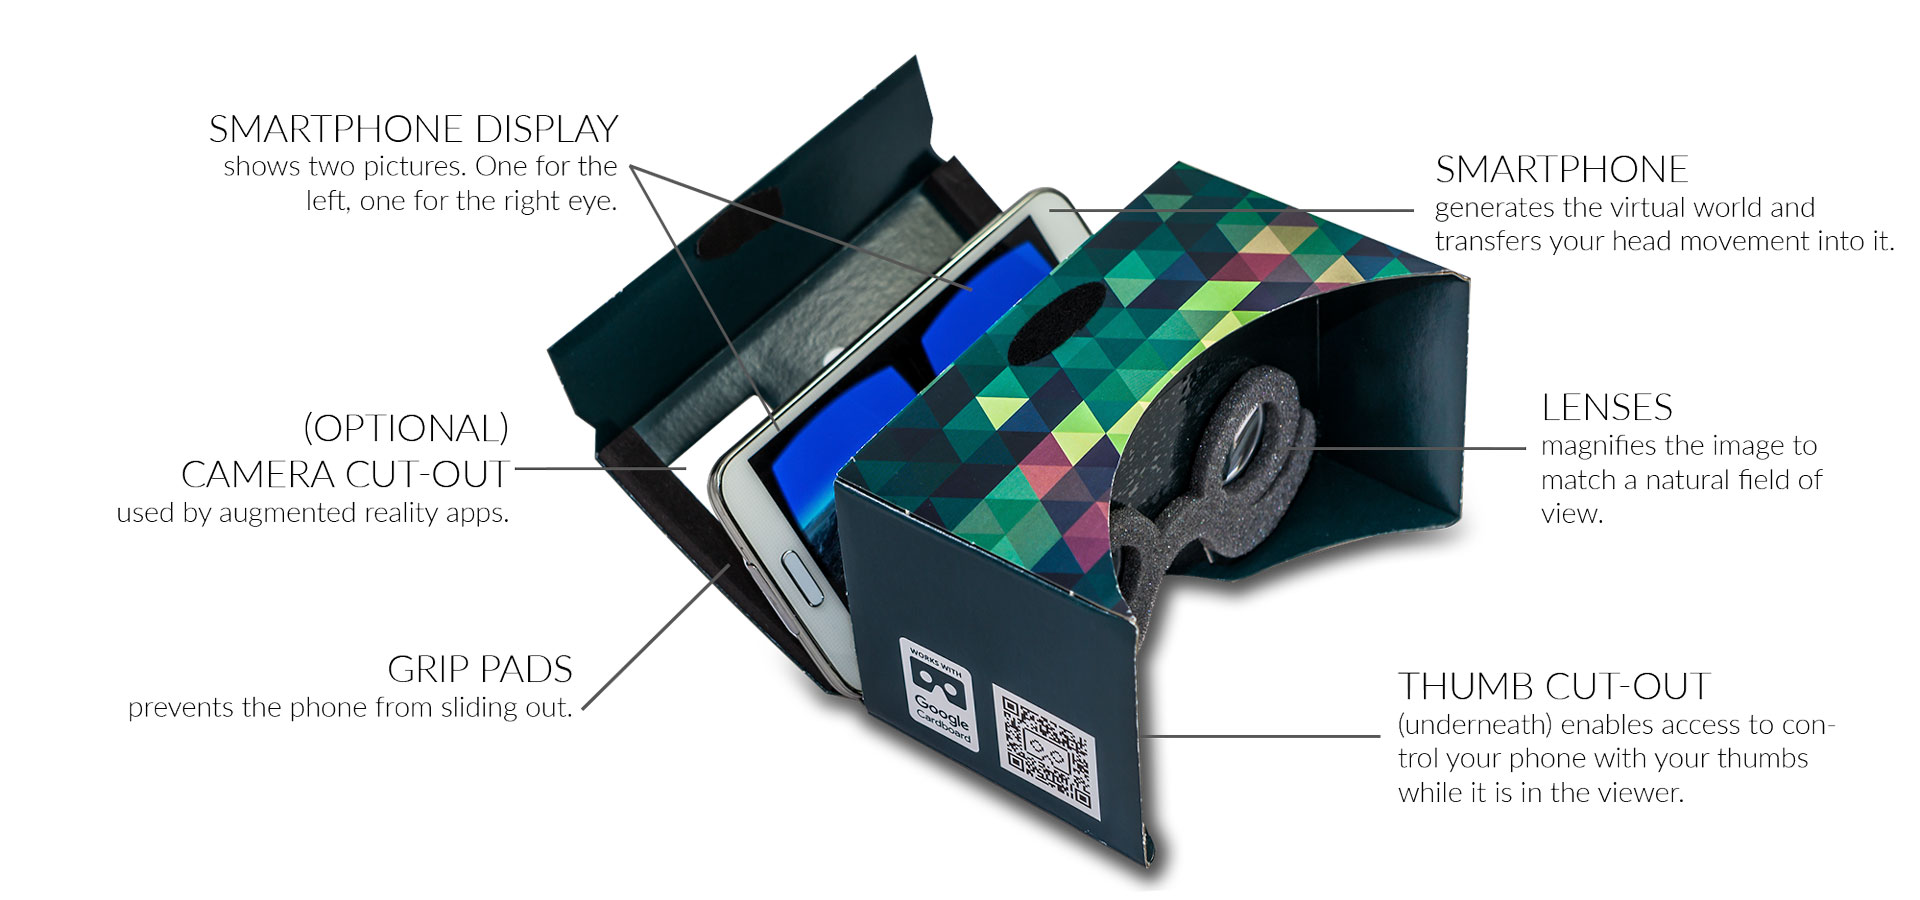
The phone holder must position your screen precisely at the focal point of the lenses. Measure your smartphone’s exact width and adjust the template accordingly—most commercial viewers accommodate phones between 55-80mm wide. Line the interior with non-reflective black craft foam to prevent internal light bounce that reduces image contrast. Add rubberized grip strips at the top and bottom of the phone slot using shelf liner material to prevent slippage during use.
Critical alignment check: when your phone is positioned in the holder, the center of the screen should sit exactly midway between the lenses. Test this by placing your assembled viewer against your face and looking through the lenses at your phone’s home screen—you should see the entire display without vignetting (darkened corners). If parts of the screen are cut off, adjust the phone slot position before final gluing. For phones with curved edges, add thin foam spacers to ensure consistent screen distance from the lenses.
Solving Common Cardboard VR Viewer Problems
Fixing Blurry Vision and Double Images
Blurry vision almost always stems from three preventable issues: dirty lenses, incorrect lens orientation, or mismatched focal distance. Clean lenses with isopropylene alcohol and a microfiber cloth using a circular motion from center outward. Verify lenses are installed with convex sides facing out—when correctly positioned, you’ll see a magnified reflection of your face. If blurriness persists, check that your lenses are precisely 40mm focal length; many cheap alternatives claim “VR compatibility” but use incorrect optics.
Double vision occurs when the lens separation doesn’t match your personal interpupillary distance. Most adults need 58-72mm between lens centers. Modify your viewer by carefully cutting wider slots for the lenses, allowing you to slide them horizontally until images merge into one. Test this adjustment while viewing a simple VR app—when correctly aligned, the 3D effect becomes instantly comfortable rather than straining your eyes.
Strengthening Flimsy Construction
Cardboard viewers often fail at stress points like the nose bridge or phone compartment corners. Reinforce these areas by applying thin strips of cardboard coated with PVA glue to the interior surfaces. For maximum durability, saturate critical joints with diluted white glue (1 part glue to 2 parts water) which penetrates the cardboard fibers and creates a rigid shell when dry. Add triangular gussets at all 90-degree corners using scrap cardboard triangles—these distribute stress and prevent the common “sagging” problem that misaligns lenses during use.
If your viewer still feels unstable, consider adding an internal skeleton using thin balsa wood strips along major structural lines. This professional technique adds minimal weight but dramatically increases rigidity, transforming a flimsy prototype into a viewer that withstands regular use. The key is balancing reinforcement with weight—you want a sturdy but comfortable headset that doesn’t fatigue your neck during extended sessions.
Maximizing Your DIY VR Experience
Software Setup for Immersive Results
Your homemade cardboard VR goggles deserve proper software configuration. Start by downloading the official Google Cardboard app which automatically detects your viewer type and optimizes display settings. Before launching VR content, enable your phone’s “Daydream” or “VR Mode” settings to prevent screen timeout during use. For the sharpest image, set display scaling to maximum resolution and disable any battery-saving modes that reduce screen quality.
Create a dedicated VR home screen with your most-used apps—YouTube VR, Within, and Matterport provide excellent free content. For gaming, install simple Cardboard-compatible titles like “VR Roller Coaster” that don’t require complex controls. Most importantly, disable all notifications before entering VR; even a single alert can break immersion and cause motion sickness in beginners. Consider using a Bluetooth gamepad for more comfortable interaction since reaching for your phone disrupts the VR experience.
Maintenance Tips for Long-Term Use
Treat your cardboard VR goggles like precision equipment to maintain optimal performance. Store them in a dry place away from direct sunlight which warps cardboard and degrades adhesives. After each use, wipe lenses with a microfiber cloth to prevent oil buildup. Every few weeks, disassemble the phone compartment to clean out dust that accumulates in the slots—this prevents scratches on your phone’s screen.
For viewers used by multiple people, add removable face padding using Velcro strips so each user can have their own hygienic foam insert. If you notice lens alignment shifting over time, keep a small jeweler’s screwdriver handy to gently tighten any loose components. With proper care, a well-constructed cardboard VR viewer can deliver hundreds of hours of immersive experiences—proving that sometimes the simplest solutions create the most magical technology.

