
Ever tried finding vintage-style aviator goggles that actually fit your face? Most off-the-shelf versions feel cheap, slip constantly, or compromise safety with flimsy materials. Learning how to make aviator goggles solves this by putting you in control of every detail – from precise facial measurements to impact-resistant lenses. This hands-on project transforms humble materials into functional eyewear that captures the golden age of aviation while meeting modern safety standards. You’ll craft goggles tailored to your unique face shape, avoiding the frustration of ill-fitting costumes that ruin photo shoots or historical reenactments.
Unlike mass-produced alternatives, handmade aviator goggles become conversation pieces that reflect your craftsmanship. The process takes 4-6 hours for beginners but yields durable eyewear you can wear for flight simulators, motorcycle adventures, or steampunk festivals. By following this how to make aviator goggles guide, you’ll master techniques passed down through generations of aviation enthusiasts – techniques that prioritize both form and function. Let’s dive into creating goggles that stay securely in place while protecting your eyes from wind, debris, and UV rays.
Essential Tools and Materials for Aviator Goggles Construction
Skipping proper preparation guarantees frustration when your leather cracks during shaping or lenses shatter during installation. Investing 20 minutes to gather these exact supplies prevents costly mistakes and ensures professional results. Never substitute polycarbonate lenses – this single decision separates authentic aviator goggles from dangerous costume props. Keep your workspace organized with all items within arm’s reach before cutting your first piece of leather.
Choosing the Right Frame Material for Your Face Shape
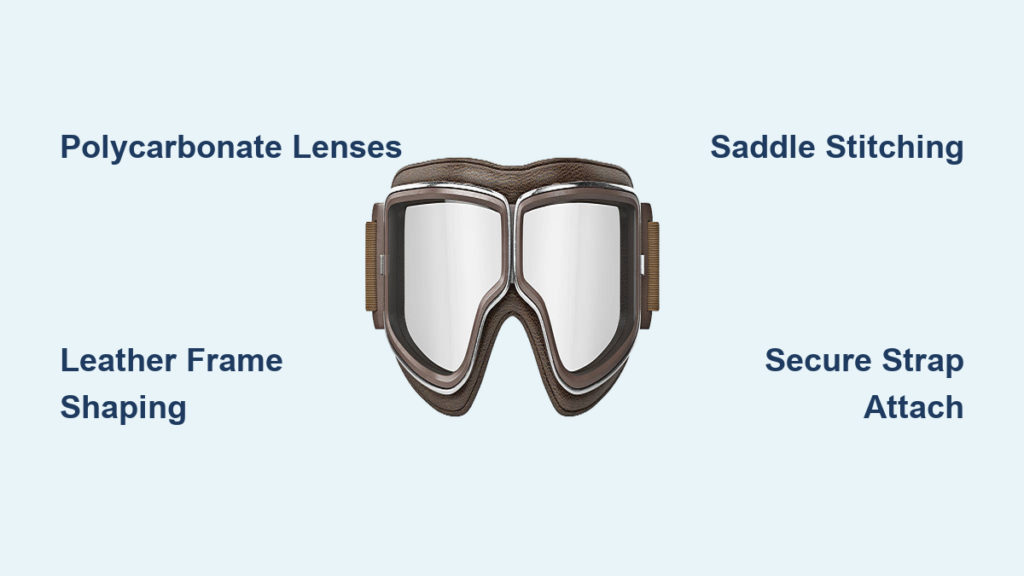
Your frame material determines comfort during extended wear and authenticity of the final product. Genuine vegetable-tanned leather (3-4mm thick) molds to facial contours within 15 minutes of wear, creating a custom seal that blocks wind infiltration. Avoid thin “craft leather” – it lacks structural integrity and will warp permanently. For steampunk variations, 0.8mm aluminum sheet works if you have a jeweler’s saw and metal file, but expect 3x longer construction time and potential pressure points on bony cheekbones. Critical warning: Skip copper or brass – these metals oxidize rapidly against skin moisture, causing green discoloration and irritation.
Selecting and Installing Impact-Resistant Lenses Safely

Polycarbonate is the only acceptable lens material – ordinary plastic cracks on impact, creating dangerous shards. Purchase 2mm-thick clear polycarbonate sheets (minimum 6″x8″) from aircraft supply stores or online retailers specializing in safety glass. When cutting:
1. Trace your frame’s eye openings onto masking tape applied to the sheet
2. Score repeatedly with a carbide-tipped scriber using a metal ruler
3. Snap cleanly over a table edge – never force cuts with knives
For tinted lenses, apply automotive-grade tint film before cutting using a credit card squeegee to avoid bubbles. Never skip the safety check: Tap lenses firmly with a screwdriver – authentic polycarbonate flexes without cracking, while inferior materials fracture audibly.
Crafting the Leather Frame Using Saddle Stitch Technique
This 3D shaping method creates the signature aviator contour that seals against facial curves. Start with two identical leather pieces cut from your 8-shaped pattern (make it 5mm larger than your lenses). Carefully cut eye holes using a rotary cutter for smooth edges. Punch 1/8″ stitching holes 3/8″ from the edge with a 4-hole prong punch – this spacing prevents leather tearing under tension. Thread a curved needle with 36″ of artificial sinew (waxed thread frays quickly), then:
1. Start stitching at the bridge of the nose with a lock stitch
2. Maintain even tension – pull until threads bury in leather
3. Use the “stab method” for tight curves: push needle through both layers simultaneously
4. End with a lock stitch and melt thread ends with a lighter
Pro mistake to avoid: Skipping the shaping step causes flat, uncomfortable goggles. While stitching is still loose, stretch the frame over a baseball for 10 minutes to create the essential facial contour.
Attaching Straps and Securing Lenses Properly
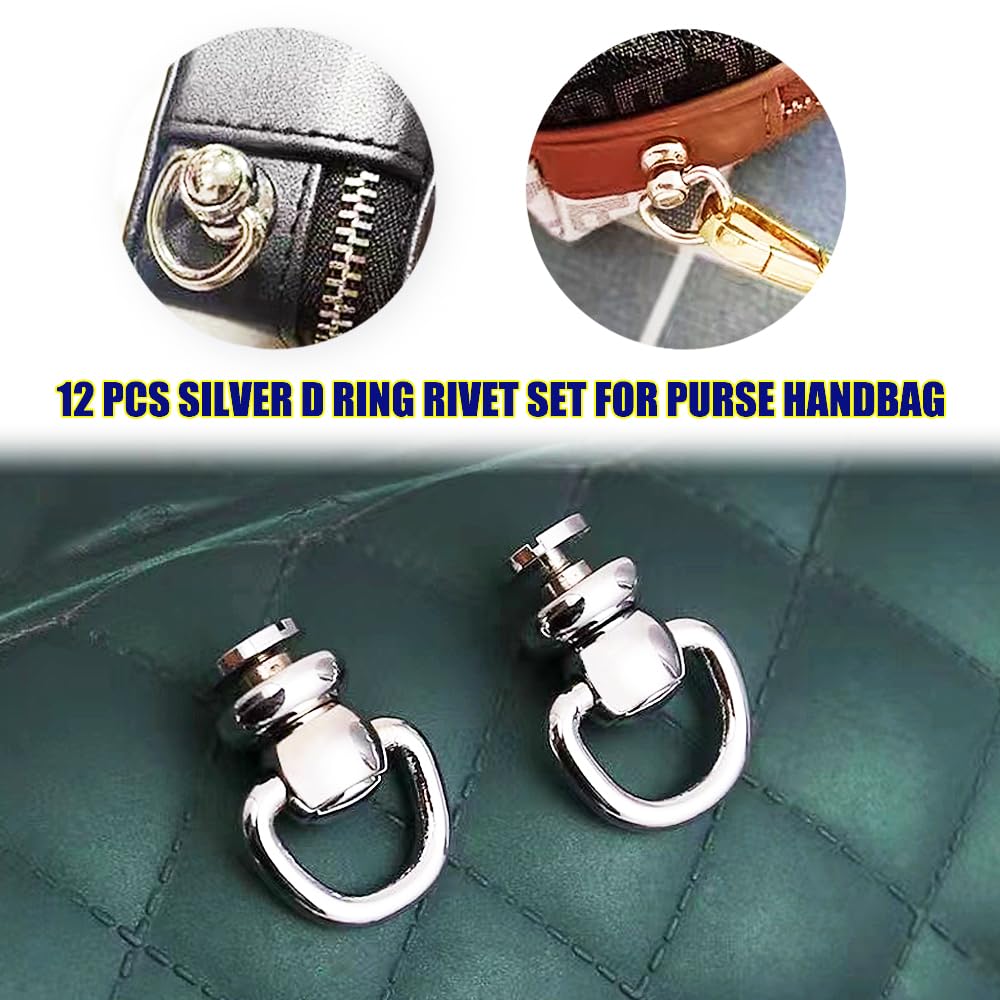
Your strap must withstand 15+ pounds of pull force without stretching. Cut 1.5″ x 24″ strips from bridle leather or nylon webbing – thin straps dig into skin during wear. Attach D-rings to both strap ends using Chicago screws (not glue!), then rivet strap ends to the frame’s outer edges with 4mm copper rivets. Critical lens installation step: Insert lenses after frame shaping but before final stitching closure. Apply a single bead of clear silicone sealant along the inner lens channel – this creates a watertight seal while allowing lens removal for cleaning. Let cure 24 hours before wear. For adjustable fit, add a ladder lock buckle 2″ from one strap end – this lets you customize tension without constant re-tying.
Adding Authentic Details That Impress Aviation Enthusiasts
True vintage goggles feature functional details modern replicas often miss. Punch three 3/16″ vent holes above each lens using a rotary tool – this prevents fogging during temperature changes. Use contrasting thread (cream on brown leather) for saddle stitching to highlight craftsmanship. For aged authenticity:
– Rub edges with black leather dye using a cotton swab
– Scratch subtle “wear marks” near nose bridge with a nail
– Apply leather conditioner with a toothbrush for mottled finish
Pro tip: Store finished goggles in a pillowcase with cedar chips – this preserves leather without attracting moths like petroleum-based conditioners.
Final Steps and Safety Check Before First Wear
Verifying Lens Security Under Real-World Conditions
Your goggles fail safety standards if lenses dislodge during impact. Perform this test: hold goggles upside down and tap lenses sharply with a plastic mallet. Polycarbonate should vibrate but remain seated. Next, wear them while shaking your head vigorously – no lens movement should occur. If lenses shift, add a second bead of silicone sealant and wait 48 hours. Never skip this step – loose lenses become dangerous projectiles during motorcycle rides or windy conditions.
Achieving Comfort for Extended Wear Sessions
Aviator goggles must stay comfortable during 2+ hour wear sessions. Wear your creation for 15 minutes while mimicking flight head movements (looking down at instruments, then up at horizon). Pay attention to pressure points:
– Temples: Adjust strap tension if indentations appear
– Cheekbones: Sand sharp frame edges with 400-grit paper
– Nose bridge: Add thin foam padding if red marks form
For optimal fit, heat the frame with a hairdryer for 60 seconds, then press firmly against your face for 2 minutes – the leather will permanently mold to your contours.
Applying Protective Finishes for Longevity
Unprotected leather dries out within months, causing cracks that compromise wind protection. Apply Obenauf’s Heavy Duty LP with a microfiber cloth using circular motions until the leather stops absorbing. Wipe excess immediately – pooling creates sticky residue. For lens care, polish with an anti-fog solution made from 1:10 dish soap and water. Critical maintenance: Never store goggles in direct sunlight – UV rays yellow polycarbonate within weeks. Instead, keep them in a breathable cotton bag with silica gel packets.
Creating a Dedicated Storage Solution
Improper storage ruins even expertly crafted goggles. Line a small toolbox with foam padding cut to your goggles’ shape. Place silica gel packets in all four corners to absorb moisture. For travel, add a rigid plastic lens cover made from cut-up credit cards – this prevents scratches during transport. Pro shortcut: Label your storage case “AVIATOR GOGGLES – DO NOT TOUCH” with vintage-style lettering – this deters curious hands at events.
Creating authentic aviator goggles rewards patience with eyewear that performs as impressively as it looks. By mastering these techniques for how to make aviator goggles, you’ve joined a tradition of aviators who trusted handcrafted gear with their vision. Remember to inspect stitching monthly and reapply leather conditioner every 3 months – this preserves flexibility during temperature swings. Your next project could be adding brass-rimmed lenses or integrating LED lighting for night events. Most importantly, wear your creation proudly: these goggles tell a story of craftsmanship every time you step into the wind.


