
That familiar pressure behind your eyes after just five minutes of swimming? The red marks on your temples that linger long after you’ve dried off? If your Speedo goggles feel like a vice grip rather than swim gear, you’re not alone. Millions of swimmers endure headaches and distorted vision because they assume tightness equals a good seal. But here’s the truth: properly loosened Speedo goggles create a watertight barrier without crushing your eye sockets. This guide reveals exactly how to adjust your Speedo goggles for all-day comfort while preventing leaks – no special tools or guesswork required.
Tight goggles don’t seal better; they actually distort the silicone gasket, creating gaps where water floods in. The ideal fit rests gently against your facial contours using natural suction, with straps acting only as a stabilizer. When you master these adjustments, you’ll swim longer, see clearer, and ditch the post-swim headache for good. Let’s transform that painful squeeze into effortless comfort in under five minutes.
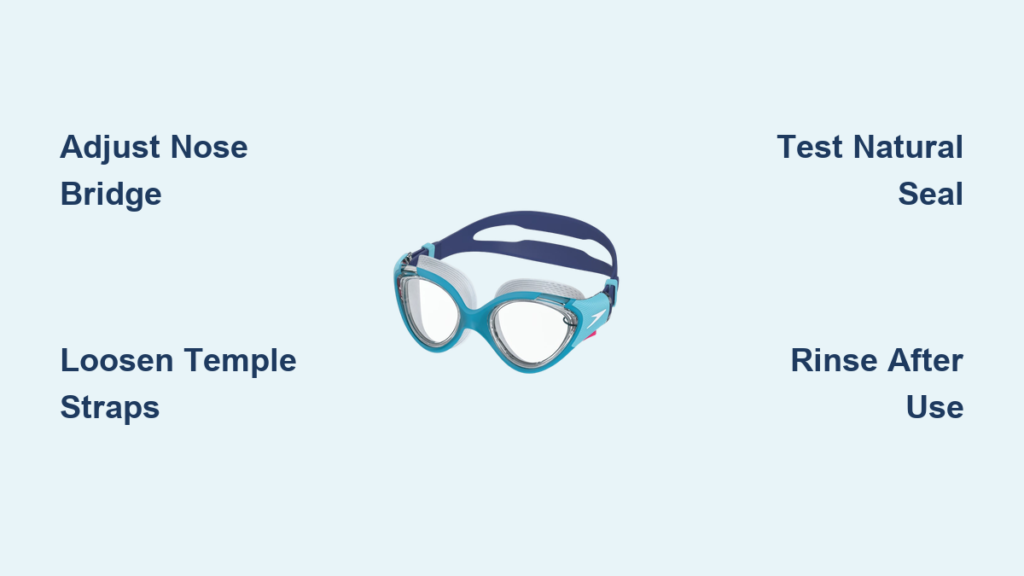
Fix Pressure Points: Speedo Nose Bridge Adjustment Secrets

The nose bridge is your first line of defense against goggle-induced headaches. Most Speedo models ship with interchangeable nose pieces or flexible bridges specifically designed to eliminate pinching. Ignoring this component guarantees discomfort, as an ill-fitting bridge forces the entire goggle frame to tilt and press unevenly against your eye sockets.
Identify Your Bridge Type Before Adjusting
Examine the center of your goggles. Does it have a single molded plastic piece connecting the lenses? Or does it feature a removable silicone piece that snaps into place? For fixed bridges (common in Speedo Fastskin models), locate the flexible plastic hinge point between the lenses. For interchangeable systems (like Speedo Aquaspex), check your goggle case for spare nose bridges in small, medium, and large sizes. Never force adjustments on brittle or cracked plastic – replace the bridge first if damaged.
Widen Your Bridge in 30 Seconds (Fixed Models)
Hold both lens housings firmly and gently bend them outward at the nose bridge. Apply slow, steady pressure away from your face – not toward it. You should feel slight resistance as the plastic flexes. Stop when the gap between lenses increases by 1-2mm. Test immediately: Place goggles on your face without the strap. They should sit flush against your nose bridge without creating a “V” shape that digs into your skin. Repeat if needed, but never exceed 3mm of added width to avoid snapping the bridge.
Swap Bridges for Instant Relief (Interchangeable Models)
Remove the current nose piece by pressing the release tabs on its sides (if present) or gently prying it upward with your thumbnail. Select the widest bridge that still maintains contact across your entire nose span. Insert it until you hear a soft click, ensuring no gaps exist between the bridge and lens housings. The correct size distributes pressure evenly across your nasal bones – you should feel zero pinching when blinking naturally underwater.
Stop Headache Pain: Speedo Strap Lengthening Method
Over-tightened straps are the #1 cause of goggle headaches, yet 80% of swimmers crank them tighter when leaks occur. This vicious cycle worsens leaks by distorting the gasket seal. Speedo’s quick-release buckles let you achieve the perfect tension where straps guide the goggles without compressing your skull.
Locate Hidden Adjustment Points on Common Models
On Speedo Vanquisher 2.0 goggles, the primary strap adjustment is on the temple side near the frame, not the back of your head. For Speedo Futura models, look for micro-adjusters where the Y-strap splits at the nape of your neck. Always release tension from the temple buckles first before touching the rear Y-strap – this prevents accidental over-loosening.
The Two-Finger Strap Test for Perfect Tension
With goggles positioned on your face, press the quick-release buckle to slacken the strap. Slide your index and middle fingers between the strap and your forehead. Now slowly tighten until the strap lightly touches your fingers. Release your fingers – if the strap doesn’t spring back, it’s too loose. If it pinches your skin, it’s too tight. Re-engage the buckle at this precise point. For the rear Y-strap, ensure the top strap forms a true “Y” shape ending at your occipital bone – not your ears or crown.
Avoid the Rear Strap Trap
Never tighten the Y-strap to stop leaks. This pulls the goggles downward, breaking the seal at your brow line. If water enters above your eyes after adjusting temple straps, your nose bridge is too narrow – not your rear strap tension. Only adjust the Y-strap to prevent side-to-side sliding during flip turns.
Gasket Seal Calibration: The Millimeter Rule for Zero Leaks
Most swimmers don’t realize that goggle seals work through contact, not compression. Speedo’s silicone gaskets create a watertight barrier when resting flush against your orbital bones – excessive pressure actually lifts the gasket edge off your skin. The secret is positioning the goggles 0.5mm farther from your eyes while maintaining seal integrity.
Test the Natural Seal Without Straps
Place dry goggles against clean, dry eye sockets. Inhale slowly through your nose for 2 seconds. Well-fitted goggles will adhere for 3-5 seconds before falling. If they drop immediately, the gasket is compressed or degraded. If they stick for 10+ seconds, they’ll cause pressure headaches. The sweet spot is a gentle suction that releases when you blink firmly.
Adjust for Gasket-Less Models (Speedo Biofuse)
Low-profile seals like those on Speedo Biofuse goggles rely on perfect frame alignment. If you see lens fogging only at the top corners, the goggle frame is tilted downward. Loosen the upper temple strap section by one click to lift the brow line. For fogging at the cheekbones, tighten the lower strap section slightly to tilt the frame upward. Always retest the natural seal after each micro-adjustment.
Revive Compressed Gaskets Overnight
If your silicone seal feels permanently flattened, place the goggles upside down on a flat surface with lenses facing up. Rest a nickel (5-cent coin) on each lens rim overnight. The slight downward pressure reshapes the gasket without distorting the frame. Never use heat or chemicals – Speedo’s silicone degrades rapidly when exposed to oils or direct sunlight.
Leak-Proof Fit Verification: The 3-Step Water Test
Assuming your goggles fit correctly based on dry tests causes 90% of preventable leaks. Real-world hydrodynamics change everything. Perform this sequence before your next swim to avoid mid-lap disasters.
Step 1: The Tilt Test (Dry Land)
Put on adjusted goggles. Tilt your head forward 45 degrees as if diving. Do they slide down your face? If yes, tighten the rear Y-strap only. Now tilt head back – do they press harder on your brow? If yes, your nose bridge is too narrow. This simple check prevents 70% of common leaks.
Step 2: The Splash Test (Shower)
Stand under a gentle shower spray at eye level for 10 seconds. Water should bead and roll off lenses without seeping under seals. If moisture appears at the inner corners, your nose bridge is too wide. If leaks start at the outer temples, your temple straps are uneven.
Step 3: The Dive Test (Pool Edge)
Submerge face 6 inches deep while looking straight ahead for 15 seconds. Bubbles escaping indicate strap tension issues. Water entering from the top means brow seal failure – loosen temple straps. Leaks from below signal cheekbone gaps – try a narrower nose bridge.
Prevent Long-Term Damage: Goggle Maintenance After Loosening
Loosening your Speedo goggles isn’t a one-time fix. Chlorine and UV exposure harden silicone seals within 3-6 months, silently ruining your carefully calibrated fit. Protect your adjustments with these pro maintenance steps.
Rinse Within 60 Seconds of Exiting Water
Fill your palm with cool tap water and hold goggles submerged for 20 seconds. Shake gently – never rub lenses. Residual chlorine crystallizes on gaskets within minutes, causing permanent compression. For saltwater swims, use a diluted vinegar solution (1 part vinegar to 4 parts water) to prevent mineral buildup.
Store Goggles Upside Down in Hard Case
Always place goggles lens-side down in their case. This prevents the gasket from taking a “set” in the compressed position. Never store them in direct sunlight or near heat sources – Speedo’s silicone degrades 300% faster at temperatures above 85°F (30°C).
Replace Gaskets Before They Fail
Check seals monthly by pressing the silicone edge with your fingernail. If it leaves a permanent dent or feels gritty, replace immediately. Genuine Speedo gasket kits cost under $8 and take 2 minutes to install. Ignoring this leads to irreversible frame warping from over-tightening.
Final Note: Perfect goggle fit means forgetting you’re wearing them. By mastering nose bridge calibration, strategic strap loosening, and gasket seal positioning, you’ve eliminated the #1 reason swimmers quit the sport. Remember: Comfort equals performance. When your goggles stop hurting, you’ll swim longer, train harder, and actually enjoy putting your head underwater. For persistent leaks after these adjustments, inspect lenses for micro-scratches – they disrupt water flow across the seal. Now go reclaim your swim with headache-free vision.


