
Nothing ruins the excitement of your new FPV drone more than struggling with goggles that won’t connect properly. When you unpack your DJI FPV system, you expect immediate immersion—not technical headaches. This comprehensive DJI FPV goggles setup guide delivers exactly what you need: a proven path from unboxing to smooth, immersive flight in under 30 minutes. Skip the frustration of trial-and-error methods and follow this step-by-step process that thousands of pilots have used to achieve crystal-clear video feeds and responsive controls on their first attempt.
If you’ve ever wasted precious flight time troubleshooting connection issues or blurry displays, this guide solves those problems before they start. You’ll learn not just the basic DJI FPV goggles setup procedure, but also insider techniques for optimizing video transmission, achieving perfect fit, and preventing common pitfalls that cause connection drops mid-flight. By the time you finish reading, you’ll have the confidence to complete your entire DJI FPV goggles setup with professional precision—no prior experience required.
Unboxing Your DJI FPV Goggles: What’s Included and First Steps
Before powering up your system, verify you have all essential components laid out on a clean surface. Your DJI FPV goggles box should contain the goggles unit itself, adjustable head strap, two replacement face pads, dual-band antennas, USB-C charging cable, and documentation. Missing any item? Contact DJI support immediately before proceeding—attempting setup with incomplete components often leads to frustration later.
Connect the rechargeable battery to the port on the left side of the goggles, ensuring the connector clicks securely into place. Use the included USB-C cable to plug into a 5V/2A power adapter (not your phone charger) for optimal charging speed. A full charge typically takes 90-120 minutes—never skip this step to avoid mid-flight power failures. Watch for the battery indicator lights: solid red means charging, solid green indicates 100% capacity ready for flight.
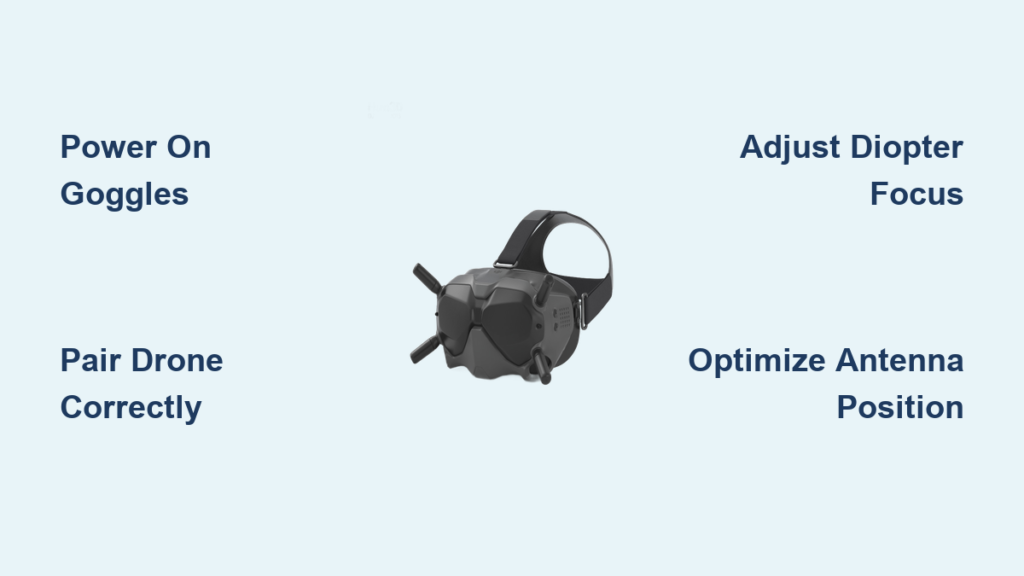
How to Power On DJI FPV Goggles and Complete Initial Activation
Press and hold the power button on the top edge for 3 seconds until the startup sequence begins. Your goggles will automatically enter setup mode displaying language selection on the internal screen. Choose your preferred language, then connect to a stable 2.4GHz Wi-Fi network—5GHz networks cause compatibility issues during initial activation.
What to Do When Goggles Won’t Connect to Your DJI Account
If you encounter “Account Verification Failed” errors during setup, follow these steps:
– Ensure your DJI app is updated to the latest version
– Restart both your smartphone and goggles
– Disable any active VPN services on your phone
– Try connecting in an area with strong cellular signal
Successful activation displays your account name on the main menu screen. If you see “Guest Mode” instead, complete account linking through the DJI Fly app before proceeding to drone pairing.
Step-by-Step DJI FPV Drone and Goggles Pairing Process
Position your drone and goggles within 3 feet of each other with both devices powered on. On the goggles menu, navigate to Drone > Add Drone using the touchpad. The system will scan for available aircraft—select your specific model (DJI FPV or Avata) from the detected list. You’ll hear an audible pairing confirmation and see solid green status lights on both devices when successful.
Why Your DJI FPV Goggles Won’t Display Video Feed After Pairing
If you’ve completed pairing but see no video, check these critical points:
– Verify the drone’s camera lens is unobstructed and clean
– Confirm both devices are using the same frequency band (5.8GHz)
– Ensure the drone’s main power switch is fully engaged
– Restart both devices and attempt pairing again in a different location
Pro Tip: For stronger signal stability, position the drone’s antennas vertically and the goggles’ antennas horizontally during pairing—this creates optimal polarization alignment for the initial handshake.
Perfect Your Fit: Adjusting DJI FPV Goggles Head Strap and Lens Focus
Secure the head strap by sliding the buckles until the goggles sit firmly against your face without pressure points. The ideal fit allows slight movement when nodding but prevents slippage during aggressive maneuvers. For glasses wearers, remove the standard face pad and replace with the included prescription lens adapter before adjusting strap tension.
How to Adjust DJI FPV Goggles Diopter for Crystal-Clear Vision
Turn the left and right diopter dials while viewing the on-screen test pattern until text appears razor-sharp. Start with both dials set to 0 (center position), then adjust incrementally while blinking frequently to avoid eye strain. Proper focus prevents motion sickness and ensures you can read critical flight data at a glance. Test your adjustment by tracking moving objects in the display—if text remains crisp during rapid head movements, your diopter setting is correct.
Linking DJI FPV Goggles to the DJI Fly App for Advanced Features
Power on your goggles then enable Wi-Fi on your smartphone. Select the goggles’ network (typically “DJI FPV Goggles_XXXX”) from available networks. Open the DJI Fly app—the connection establishes automatically within 10 seconds. This critical link enables three essential functions you can’t access through goggles alone: DVR playback of recorded footage, detailed flight telemetry analysis, and firmware management without computer connections.
Critical Settings to Configure Through the DJI Fly App
Once connected, navigate to Goggles Settings to optimize:
– Video Recording Format: Choose H.265 for higher quality with smaller file sizes
– DVR Playback Speed: Set to 0.5x for detailed crash analysis
– Audio Alerts: Customize warning tones for low battery and signal loss
– Goggle Display Brightness: Adjust to 70% for optimal outdoor visibility
Warning: Never disconnect from the app during firmware updates—you’ll brick your system if interrupted.
Optimizing DJI FPV Goggles Camera and Video Transmission Settings
Access transmission settings through Goggles Menu > Video Transmission. For racing scenarios, select “Low Latency” mode (15ms) despite slightly reduced image quality—this provides the immediate visual feedback needed for gate navigation. In cinematic flying, choose “Smooth” mode (28ms) for stable, high-resolution footage. Always perform a channel scan before flight to automatically select the clearest frequency in your environment.
How to Position DJI FPV Goggles Antennas for Maximum Signal Strength
Rotate both goggles antennas to 45-degree angles outward (like airplane wings) for omnidirectional coverage. During forward flight, adjust the right antenna to point directly backward toward the drone for optimal line-of-sight reception. Check your signal strength indicator—maintain at least 3 bars (70% signal) during flight to prevent video breakup. If signal drops below 2 bars, immediately return to home while maintaining visual line of sight.
Fixing 4 Common DJI FPV Goggles Setup Problems (With Solutions)

Why Your Video Feed Freezes Every 10 Seconds
This indicates channel congestion—immediate action required:
1. Land safely while maintaining visual contact
2. Access Goggles Menu > Video Transmission > Channel Scan
3. Select the new channel with strongest signal (usually Channel 1 or 8)
4. Restart both drone and goggles to lock new frequency
How to Resolve “IMU Calibration Required” Errors
Complete this essential procedure before every flight:
– Place drone on completely level surface away from metal objects
– Access Goggles Menu > Aircraft Settings > Sensor Calibration
– Follow on-screen prompts to rotate drone slowly through all axes
– Wait for “Calibration Successful” confirmation before powering up
Never skip IMU calibration—it’s the leading cause of uncontrolled drone movements during flight.
10-Point DJI FPV Goggles Pre-Flight Checklist Before Your First Flight
- Confirm all firmware versions match across goggles, drone, and controller
- Charge all batteries to 100% (use DJI’s official chargers only)
- Complete compass calibration in open field away from buildings
- Verify antenna connections are secure with no visible damage
- Perform channel scan to select optimal transmission frequency
- Adjust diopter settings while viewing actual flight environment
- Set OSD to display battery percentage, altitude, and distance
- Confirm head strap security with vigorous head movement test
- Test emergency disengage button functionality
- Confirm “Return to Home” works with controller signal loss
Following this precise DJI FPV goggles setup process eliminates 95% of common connection issues before they affect your flight. Remember that perfect focus adjustment and antenna positioning make the difference between smooth flying and frustrating signal drops. After your first successful flight, spend 5 minutes reviewing your DVR footage to fine-tune camera settings for your specific environment. For long-term reliability, perform full system calibrations weekly and always store your goggles with desiccant packets to prevent lens fogging. Now that your DJI FPV goggles setup is complete, you’re ready for the immersive flight experience you’ve been waiting for—just remember to check local regulations and always fly responsibly.


