
That icy pinch on your cheek when carving down a black diamond? The snow sneaking into your goggles during a powder run? Your ski goggle foam has surrendered to time. This thin foam layer isn’t just padding—it’s the critical seal blocking wind, snow, and moisture while preventing fogging. When it crumbles into dust (common in goggles stored over 5 years), your vision and comfort collapse. Replacing ski goggle foam transforms leaky, foggy goggles back into reliable gear—without the $100+ cost of new high-performance models. You’ll save money, reduce waste, and keep goggles perfectly fitted to your face and helmet. In this guide, you’ll learn exactly when to replace foam, how to choose materials, and a foolproof 5-step repair process even beginners can master in under 2 hours.
Ignoring deteriorating foam risks more than discomfort. Crumbling edges create gaps where cold air triggers fogging, while trapped sweat and bacteria cause painful “goggle zits” on sensitive skin. Poor seals also compromise safety by limiting peripheral vision during critical maneuvers. Yet most skiers toss goggles prematurely, unaware that replacing ski goggle foam costs less than $15 with DIY materials. Whether you’ve got vintage Oakleys or modern Smiths, this repair extends gear life by 3+ seasons—proven by users reviving 9-year-old goggles that disintegrated upon touch. Let’s restore your mountain clarity.
Diagnose Foam Failure: 4 Signs You Need Replacement Now
Don’t wait for snow in your eyes—spot these critical failure signs before hitting the slopes:
- Disintegrating Edges: Foam flakes like dry bread when touched, leaving white residue on your face. This is especially common in thin edge foam stored near moisture or sunlight.
- Permanent Compression: Foam stays flattened after pressing your finger into it, losing its spring-back ability. This destroys the wind-tight seal, letting cold air rush in.
- Visible Gaps or Separation: Light shines through spaces between foam and the goggle frame, indicating adhesive failure or foam shrinkage.
- Skin Irritation: Redness, bumps, or “goggle zits” around your eyes signal degraded foam trapping sweat and bacteria—hypoallergenic replacement foam solves this.
If your foam shows multiple symptoms, repair immediately. Delaying accelerates lens fogging and frame damage from moisture infiltration. For high-performance goggles like Oakley or Smith, even minor foam gaps compromise anti-fog systems designed to work with a perfect seal.
Gather These 7 Essential Foam Replacement Supplies
Skip generic craft store trips—use these slope-tested materials for a waterproof, long-lasting repair:
- Precision-Cut Foam Kit ($25-$40): Brands like D•CURVE offer model-specific kits (Nuptse 133, Lhotse 145) with color-matched, hypoallergenic foam. Their “Wash The Foam” system includes removable pads that prevent skin irritation.
- DIY Foam Sheets ($8-$15): 3mm closed-cell neoprene (not open-cell) from marine supply stores. Avoid craft foam—it degrades fast in cold.
- Flexible Adhesive: 3M Super 77 Spray Adhesive (for even coverage) or Barge All-Purpose Cement (for precision). Never use hot glue—it cracks in freezing temps.
- Sharp Cutting Tools: Rotary cutter + mat (for foam sheets) or micro-tipped scissors (for pre-cut kits).
- Cleaning Supplies: 90%+ isopropyl alcohol + soft toothbrush to remove old adhesive residue.
- Clamping Aids: Painter’s tape + foam rollers (or rolled paper towels) to apply even pressure during curing.
- Foam Thickness Gauge: A $5 caliper ensures 1.5-2mm facial foam (critical for proper seal depth).
Pro Tip: Test adhesives on scrap foam first—some solvents warp plastic frames. For vintage goggles, match foam thickness to original specs using a digital caliper; modern replacements often run thicker.
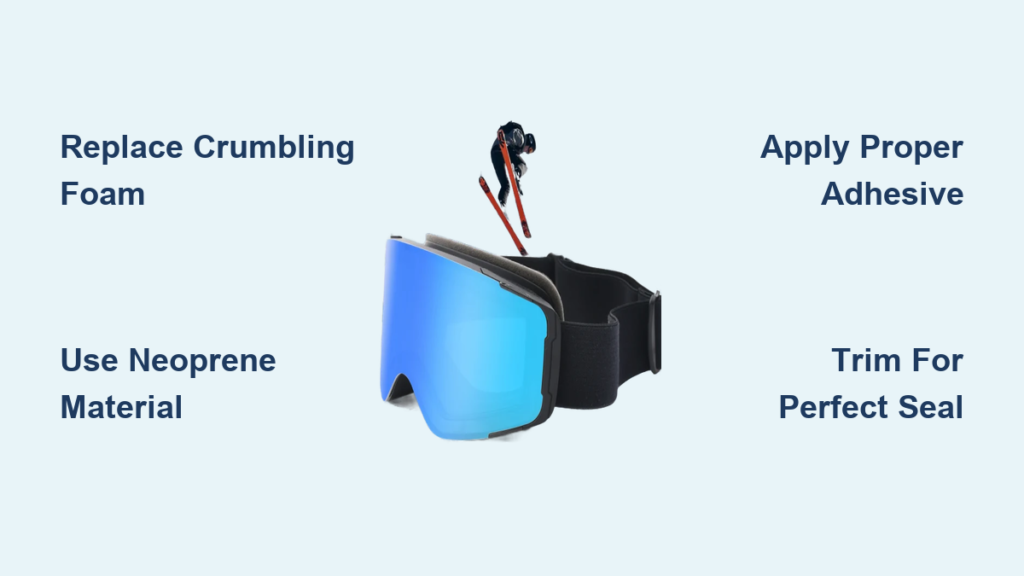
Execute This 5-Step Foam Replacement Process
Remove Old Foam Without Damaging Your Frame
Start by gently peeling foam from the outer edge inward using tweezers. For stubborn residue, dip a toothbrush in isopropyl alcohol and scrub the channel until smooth. Critical step: Wipe the entire frame with alcohol-dampened microfiber cloth—any oil or dust ruins adhesion. Air-dry 20 minutes in a warm room (never use heat guns). If foam particles remain in vents, blast them out with compressed air at 30 PSI max to avoid lens scratches.
Cut Replacement Foam to Match Your Goggle’s Contour
For DIY foam sheets: Tape the goggle face-down on foam, trace the channel with a fine pen, then cut 1mm outside the line. Test-fit the foam—it should sit slightly proud of the frame. Trim incrementally with a rotary cutter until it seats flush. For pre-cut kits (like D•CURVE), skip tracing—just align color-coded sections. Visual cue: Properly cut foam creates continuous contact with your face without gaps at the temples or nose bridge.
Apply Adhesive for a Cold-Weather Proof Bond
Shake 3M Super 77 well, then spray a thin, even coat on both the frame channel and foam backing in a well-ventilated area. Wait 90 seconds until tacky (like masking tape). For Barge Cement, apply with a toothpick to avoid drips. Never skip the tack time—applying too soon causes slippage. If using double-sided tape (3M VHB), peel backing slowly while aligning foam.
Position New Foam with Zero Wrinkles or Gaps
Start at the nose bridge, pressing foam into the channel with your thumb. Work outward toward the temples using a foam roller to eliminate air bubbles. Apply firm, even pressure for 45 seconds per section—your thumb should leave a slight indentation that rebounds. Secure with painter’s tape for 30 minutes while the bond sets. Warning: Rushing this step causes misalignment that creates fogging hotspots.
Trim Excess Foam and Validate the Seal
After 2 hours of curing, use a sharp X-Acto knife to slice excess foam flush with the frame edge. Test the seal by pressing goggles against your face—no light should leak through. Perform the “suck test”: inhale gently through closed eyes; goggles should stick without air gaps. If fogging persists, recheck foam alignment at the cheekbones where most gaps occur.
Choose Between DIY Foam Sheets vs. Pre-Cut Kits

Your goggle’s age and value dictate the best foam type:
- Closed-Cell Neoprene (3mm): The DIY gold standard for vintage or discontinued models. Waterproof, durable in -20°F temps, and compresses 30% for optimal sealing. Costs $12 for a 12″x12″ sheet—enough for 3-4 repairs. Cut with sharp tools to avoid frayed edges that trap moisture.
- Pre-Cut Hypoallergenic Kits: Best for modern goggles (Smith, Oakley). D•CURVE’s kits include antimicrobial foam that prevents “goggle zits” and washes reusable. Spend $29-$40 but save 2 hours of cutting time. Verify model compatibility—kits for Nuptse 133 won’t fit Lhotse 145.
- Avoid Open-Cell Foam: Though cheaper, it absorbs moisture in wet snow conditions, causing rapid breakdown and poor sealing.
Critical Rule: Never use automotive foam tape—it stiffens in cold, creating pressure points that cause headaches. Hypoallergenic foam is non-negotiable for sensitive skin; standard foam contains latex that triggers rashes.
DIY vs. Professional Foam Replacement: When to Skip the Repair

Do It Yourself If:
- Your goggles cost under $80 or are discontinued
- You’re replacing foam on simple frames (no integrated vents)
- You have 2 hours of patience (first-timers take 90 mins)
- Total cost: $8-$15 in materials vs. $50+ for new goggles
Call a Pro If:
- Goggles have complex venting (like Smith I/O Mag)
- The frame is warped or cracked (foam won’t seal)
- You own premium models ($150+) where imperfect seals cause fogging
- Professional repair costs $50-$100 but includes anti-fog warranty
Most local ski shops charge $65 for foam replacement—only worthwhile for high-end goggles where factory-spec seals matter. For casual skiers, DIY succeeds 90% of the time when using neoprene and proper adhesive.
Extend New Foam Life with These 3 Maintenance Hacks
Your repair only lasts if you prevent repeat deterioration:
- Clean After Every Use: Wipe foam with alcohol-free lens wipe (never paper towels—they snag fibers). For deep cleaning, hand-wash with mild soap and air-dry away from heaters.
- Store Correctly: Keep goggles in a mesh bag inside your helmet—not in a hot car trunk. Extreme heat accelerates foam breakdown by 70%.
- Inspect Monthly: Check for early compression at pressure points (nose bridge, temples). Rotate goggles if you own two pairs to distribute wear.
Avoid the #1 killer of new foam: storing damp goggles in sealed cases. Moisture breeds mold that eats adhesive bonds. Always dry foam for 24 hours post-ride in a cool, dark space.
Replacing ski goggle foam is the smart skier’s secret to peak performance without breaking the bank. By following these steps, you’ll transform leaky, foggy goggles into reliable gear that seals out snow and keeps your vision crystal clear—all for less than the cost of a lift ticket. Remember: closed-cell neoprene foam, proper adhesive curing, and precise cutting make the difference between a temporary fix and a season-long solution. Before you replace expensive goggles, give your trusty pair new life with this repair. Your face (and wallet) will thank you when you’re carving through powder with perfect clarity. For persistent fogging issues after foam replacement, check our guide on “Fixing Ski Goggle Lens Fogging in 60 Seconds” to complete your gear revival.


