
Scratched or damaged lenses do not mean you need to buy an entirely new pair of sunglasses. Learning how to replace sunglasses lenses saves money, reduces waste, and lets you upgrade to polarized or UV-protected options. Whether you have Ray-Ban Wayfarers, Oakley Holbrooks, or classic Aviators, most full-frame and sport-style sunglasses can be refreshed at home in under 30 minutes with basic tools and the right replacement lenses.
This guide walks you through identifying your frame model, removing old lenses safely, installing new ones correctly, and knowing when to call a professional.
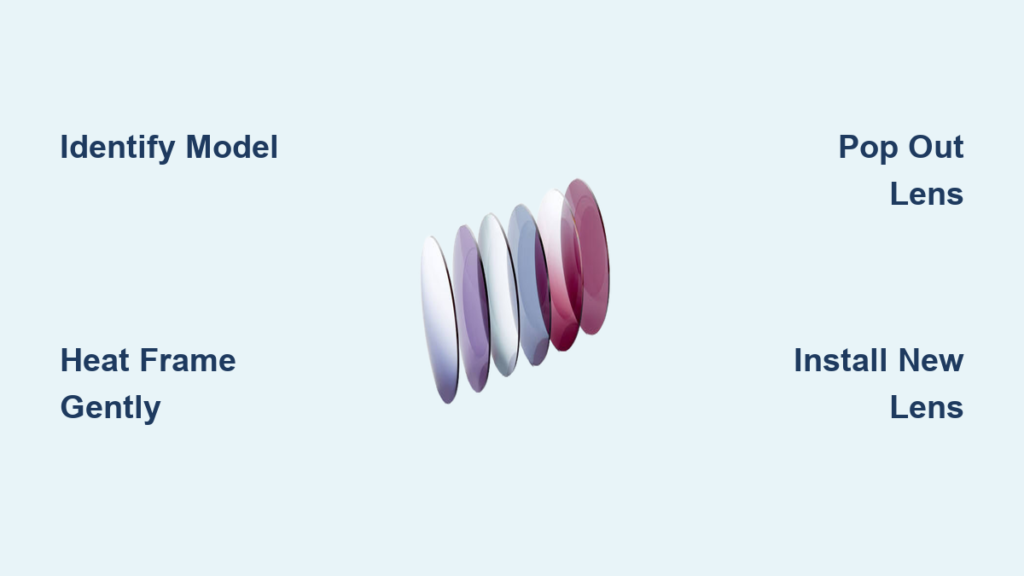
Identify Your Sunglass Model Before Buying
Finding the exact model number is the first critical step. Without it, you risk ordering lenses that will not fit your frames.
Locate Model Information on Your Sunglasses
Flip your sunglasses and examine the inside of one temple arm. Look for these key details:
- Brand name such as Oakley, Ray-Ban, or American Optical
- Model number like OO9102 or RB2140
- Lens width in millimeters such as 55mm
- Bridge size and arm length
These numbers, often formatted as something like “RB2140 55□17 145,” tell replacement lens sellers exactly which lenses fit your frames.
Where to Search for Compatible Lenses
Use your model number to search these sources:
- Manufacturer websites directly such as Oakley.com or Ray-Ban.com
- Third-party specialists like Revant Optics or ReplacementLenses.com
- Local opticians for custom-cut lens options
Pro Tip: Revant Optics lets you search by brand and model, offering polarized, mirrored, and photochromic upgrades that meet ANSI Z80.3 impact standards.
Choose the Right Replacement Lenses
Selecting the correct lens type ensures safety, clarity, and a secure fit for your frames.
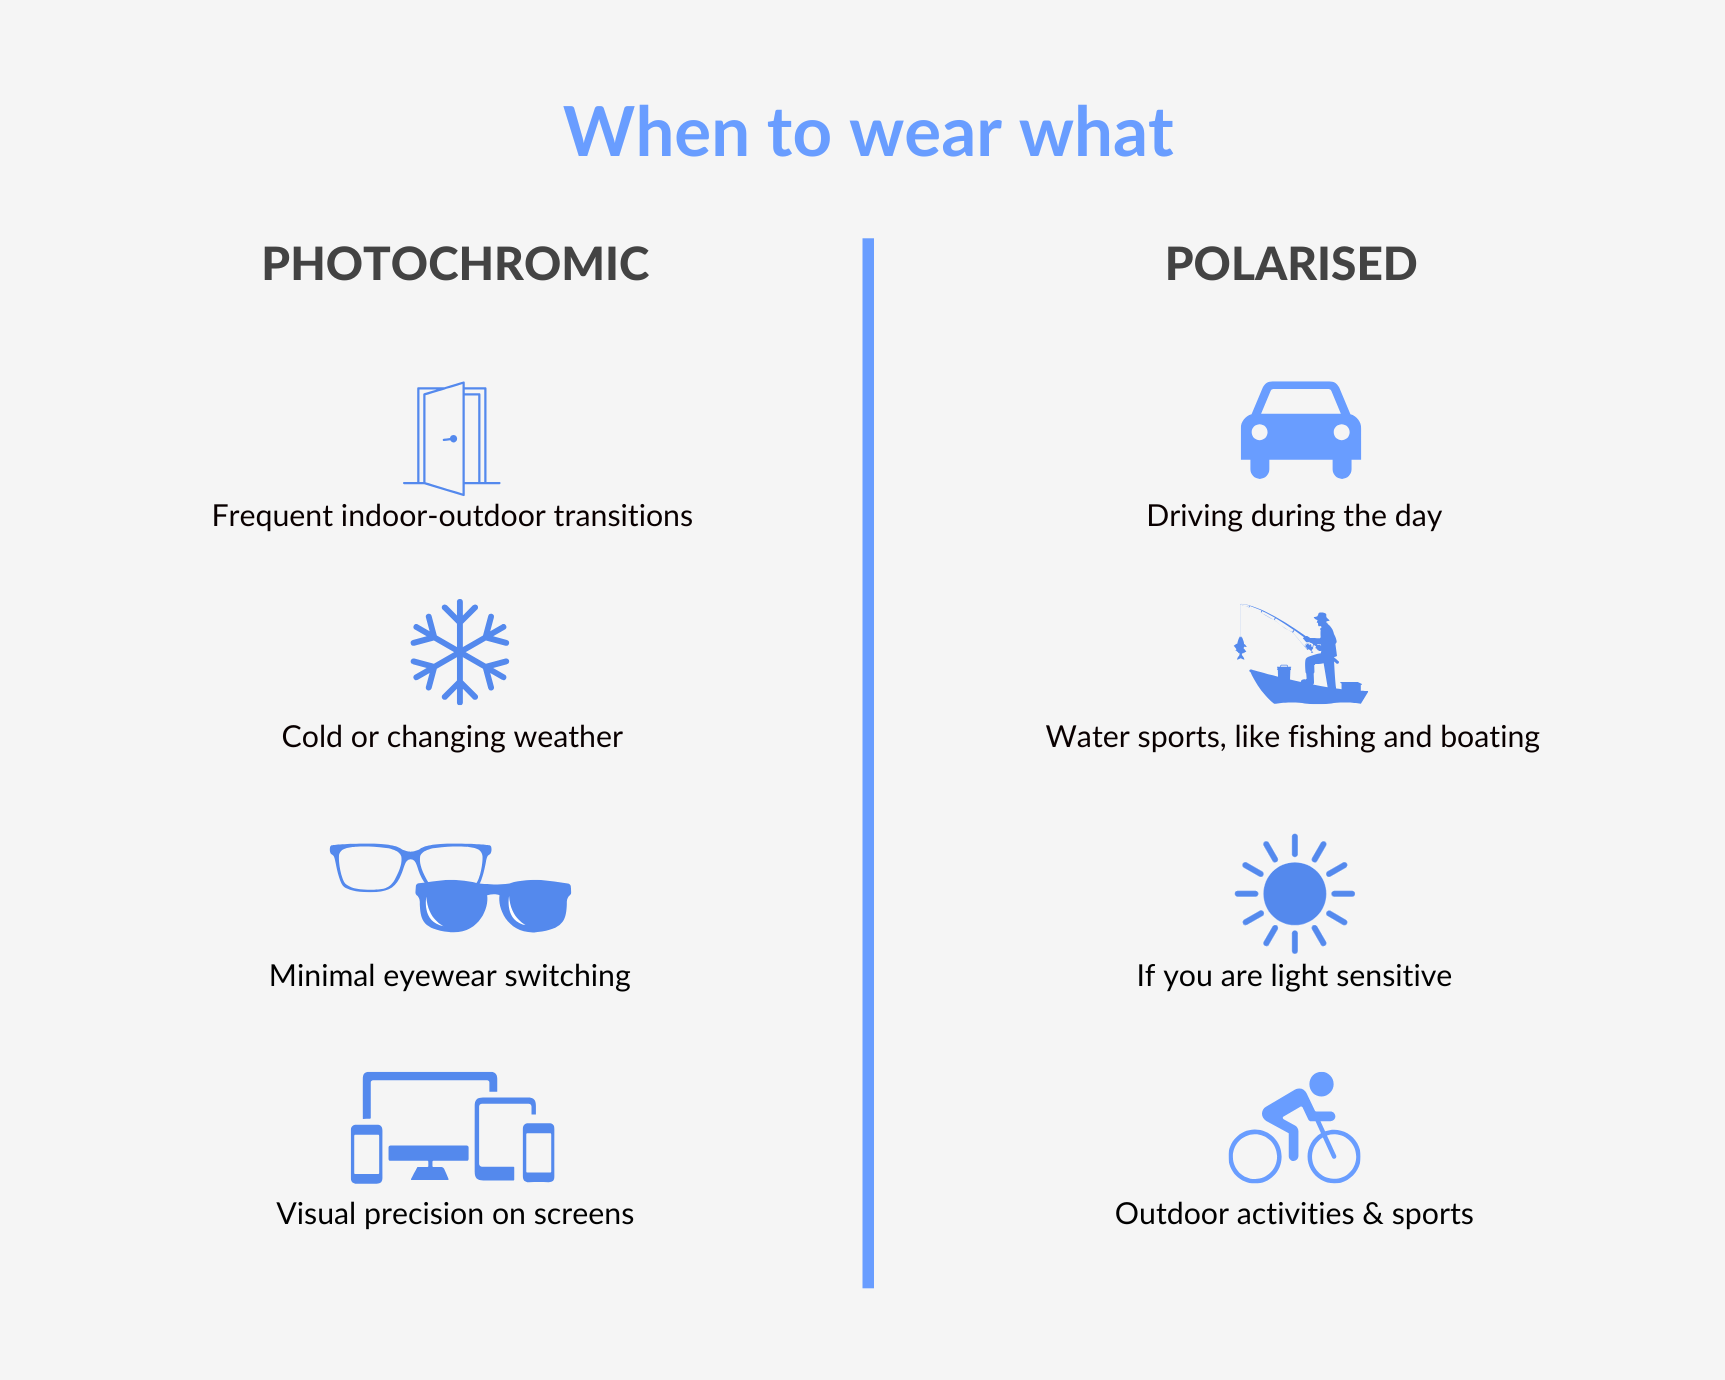
Lens Types and Their Best Uses
| Lens Type | Best Activities | Key Benefit |
|---|---|---|
| Polarized | Driving, water sports, snow activities | Reduces blinding glare effectively |
| Mirror Coated | Bright sun, snowy conditions | Reflects light and provides stylish appearance |
| Photochromic | Variable light conditions | Automatically adjusts tint indoors and outdoors |
| Gradient Tint | Fashion, driving | Darker at top, clearer at bottom for dashboard visibility |
Comparing Lens Materials
| Material | Weight | Durability | Clarity | Ideal For |
|---|---|---|---|---|
| Polycarbonate | Light | High impact resistance | Good optical quality | Everyday wear, sports, kids |
| Glass | Heavy | Low (can shatter) | Excellent | Vintage frames, maximum optical precision |
| Nylon (AOLite™) | Light | Very high durability | Superior | Performance and outdoor use |
Note: Polycarbonate is the most common choice for DIY lens replacement. It is lightweight, shatter-resistant, and affordable. Revant Optics uses optical-grade polycarbonate with 100% UV protection.
Remove Old Lenses From Plastic Frames
The removal technique depends on your frame type. Applying heat helps soften plastic frames safely, but never force a lens out.
Heat the Frame Gently
- Fill a bowl with hot tap water at approximately 140°F.
- Submerge your sunglasses for 30 seconds.
- Remove and attempt to pop out the lens gently.
- If the lens remains stuck, repeat heating in 30-second intervals, up to 5 minutes total.
Alternative: Use a hairdryer on low heat, held 6 inches away, in 10-second bursts. Avoid overheating as plastic can warp.
Pop Out the Lens Safely
- Locate the nose bridge area, which is usually the most flexible point on the frame.
- Pinch the frame gently at the bridge to open the groove.
- With your fingers behind the lens, push outward while pulling the frame away.
- Twist slightly if needed. A popping sound is normal and indicates release.
- Repeat for the second lens.
Warning: Stop immediately if resistance increases. Reheat the frame before continuing. Forcing a stuck lens can crack the frame permanently.
Remove Lenses From Sport and Flexible Frames
Sport-style frames like Oakley Holbrook or Gascan are designed for quick, tool-free lens swaps.
Tool-Free Removal Method
- Turn your sunglasses upside down.
- Pull the top rim outward with one hand while pushing the bottom rim inward with your other hand.
- Use your thumb to press the lens from the inside, pushing it upward and out.
- The lens should release with a snap.
- Repeat for the second lens.
These frames are specifically engineered for tool-free lens changes. No heat or special equipment is needed.
Remove Lenses From Metal Frames
Metal frames like Ray-Ban Aviators typically hold lenses with a thin metal wire called an eyewire or with small screws.
If Your Metal Frames Have Screws
- Use a micro screwdriver to remove the small screw at the temple hinge.
- This action loosens the eyewire.
- Gently bend the metal rim outward.
- Slide the lens out from the front.
If Your Metal Frames Use Pressure Fit
- Warm the frame slightly with warm water.
- Gently flex the rim open and slide the lens out.
Tip: Work slowly and carefully. Metal can lose its spring tension if bent too far repeatedly.
Install New Lenses in Full-Frame Plastic Sunglasses
Install new lenses immediately after removing old ones, before the frame cools or springs back.
Start at the Temple Side
- Hold the new lens by its edges only.
- Align the outer edge near the temple with the frame groove.
- Press the lens into place, starting at the top, then moving to the bottom.
Work Toward the Nose Bridge
- Use your thumb to gradually press the lens into the nose area.
- Apply even pressure throughout the process.
- The lens should click or snap into the groove when fully seated.
Check for Proper Seating
- Run your thumb around the entire rim of the frame.
- Look for gaps, bulges, or uneven edges.
- If the lens is not seated properly, reheat the frame and try again.
Pro Tip: Lay your sunglasses on a flat surface. Both lenses should sit flush with the frame with no tilting.
Install New Lenses in Sport Frames
Insert Top-First Method
- Align the upper edge of the lens with the frame groove.
- Press the top center into place first.
- Use both thumbs to press the sides and bottom inward.
- The lens will snap into position with even pressure.
Most sport models require no tools or heat for installation, according to Revant Optics.
Install New Lenses in Metal Frames
Slide Into Eyewire
- Tilt the lens slightly and insert the top edge into the groove.
- Guide it down and press the bottom into place.
- If your frames use screws, reinsert and tighten the temple screw.
Re-Close the Rim
- Gently squeeze the frame back into its original shape.
- Ensure the lens is fully seated and centered.
Warning: Over-tightening screws can crack lenses. Tighten just enough to hold the lens securely.
Final Checks and Maintenance
Inspect Fit and Alignment
- Look straight on at the sunglasses. Lenses should be centered and symmetrical.
- Check for gaps by running your finger around the rim.
- Wear the sunglasses and walk around to test comfort and clarity.
Clean and Store Properly
- Wipe lenses with a microfiber cloth only.
- Avoid paper towels or shirts, which can scratch coatings.
- Store in a hard case when not in use.
Adjust Frame if Needed
- Temple arms too tight? Gently bend outward at the hinge.
- Nose pads uneven? Adjust with your fingers or pliers carefully.
- Frame crooked? Lay on a flat surface to check balance.
When to Choose Professional Replacement
DIY works well for many frames, but some situations require expert help.
Frames Best Left to Professionals
- Vintage or collectible frames that have sentimental or monetary value
- Rimless or semi-rimless designs with drilled and screwed lenses
- Prescription sunglasses requiring precise optical alignment
- Metal frames with tension wires that need special re-tensioning
- High-end brands like Persol or custom titanium frames
What Professionals Do Differently
- Use controlled heating with infrared tools to avoid warping frames
- Apply lens pliers and frame alignment jigs for precision
- Ensure optical center alignment is correct for vision clarity
- Re-tension metal frames to match factory specifications
Cost Comparison
| Option | Cost Range | Time Required | Best For |
|---|---|---|---|
| DIY (Revant Optics) | $25–$45 | 10–30 minutes | Casual use, sport, plastic frames |
| Custom-Cut Lenses | $45+ | 2–5 days | Discontinued or rare models |
| Optician Service | $50–$150 | 1–3 days | Metal, vintage, or prescription |
Troubleshoot Common Problems
Lens Will Not Seat Fully
- Cause: Frame cooled too quickly or debris is in the groove
- Fix: Reheat the frame and clean the rim with a soft brush, then try again
Frame Cracks During Removal
- Cause: Overheating or excessive force applied
- Fix: Stop immediately. A jeweler’s epoxy may repair minor cracks. Major cracks require professional repair or frame replacement
Lens Pops Out Easily
- Cause: Wrong size or model mismatch
- Fix: Double-check your model number and return the lens for the correct size
Vision Looks Distorted
- Cause: Warped lens or misalignment
- Fix: Remove and reseat the lens. If the problem persists, return the lens for replacement
Uneven Tint or Coating Bubbles
- Cause: Manufacturing defect
- Fix: Contact the seller, as most offer warranty replacements
Key Takeaways for Replacing Sunglasses Lenses
Replacing sunglass lenses is a practical, sustainable way to extend the life of your favorite frames. For plastic and sport-style sunglasses like Ray-Ban Wayfarers or Oakley Holbrooks, most lens swaps can be completed at home in under 30 minutes using simple heat and gentle pressure. The key steps involve identifying your exact model number, sourcing compatible replacement lenses, heating plastic frames carefully to avoid warping, and pressing new lenses into place with even pressure starting from the temple side.
Always handle lenses by the edges to protect coatings, work on a soft surface to prevent damage, and test the fit before final insertion. Keep your original lenses stored in case of returns or fit issues. For metal frames, vintage styles, or prescription sunglasses, professional installation is strongly recommended to ensure proper optical alignment and avoid damaging valuable frames. Whether you choose DIY with Revant Optics or professional service, lens replacement lets you cut costs, reduce environmental waste, and customize your sunglasses for any activity.
Frequently Asked Questions About Replacing Sunglass Lenses
Can I replace the lenses in any sunglasses myself?
Not all sunglasses are designed for easy lens replacement. Full-frame plastic and sport-style frames are typically DIY-friendly, while rimless, semi-rimless, vintage, and metal frames with complex eyewire systems usually require professional installation to avoid damaging the frames or misaligning the optics.
How much does it cost to replace sunglasses lenses?
DIY replacement lenses from retailers like Revant Optics cost between $25 and $45 per pair. Professional optician services typically range from $50 to $150, depending on the frame type, lens material, and labor involved.
Do replacement lenses come with UV protection?
Reputable replacement lens sellers like Revant Optics offer lenses with 100% UV protection that meet ANSI Z80.3 impact resistance standards. Always verify UV protection specifications before purchasing.
How long does it take to replace sunglasses lenses?
For most full-frame plastic or sport sunglasses, the entire process takes 10 to 30 minutes once you have the correct replacement lenses. Professional installation may require 1 to 3 days including wait time.
What tools do I need to replace sunglass lenses at home?
For simple sport frames, no tools are required. For full-frame plastic sunglasses, you need a bowl for warm water or a hairdryer and a microfiber cloth. Metal frames with screws require a micro screwdriver. No specialized tools are needed for basic DIY replacement.


