
Nothing ruins a smooth swim session faster than the sting of chlorinated water flooding your eyes. When your swim goggles leak, your focus shifts from perfecting your stroke to constantly adjusting your gear. This frustration affects 78% of competitive swimmers at some point in their training. The good news: most leaks are fixable with the right diagnostic approach and targeted solutions. Whether you’re using Speedo Vanquisher 2.0s or budget-friendly training goggles, this guide will help you identify the exact leak source and implement a lasting fix—so you can get back to swimming with clear, comfortable vision.
Pinpoint Your Leak Source with Professional Testing Methods

Before attempting any fix, you must identify exactly where and why water is entering. Guessing wastes time and often makes problems worse. Follow this water intrusion testing protocol used by professional swim teams.
Start with the Static Pressure Seal Test. Fill your sink with cool water and press the gaskets firmly against your eye sockets without using the strap. Inhale gently through your nose to create suction—the goggles should stay in place for 3-5 seconds. If they fall immediately, you have a fundamental fit issue. If they hold but leak during swimming, you’ve got a pressure-specific problem.
Next, perform the Bubble Mapping Technique. Submerge your goggles in water and press air pockets toward the suspected leak area. Watch for telltale bubble streams—these reveal your exact failure point. For micro-leaks, apply liquid dish soap around the seal edges; bubbles will form precisely where water enters. The Speedo Vanquisher 2.0’s triple-seal design often leaks at the nose bridge, while budget goggles typically fail at the temple area.
Complete your diagnosis with the Dynamic Pressure Simulation. Put on your goggles and gently press the lenses against your face with your palms, applying light, even pressure around the entire seal. This mimics the pressure of diving or turning. If water pushes through specific spots, you’ve found your localized failure. Common problem areas include the top corners (where brow bone meets frame) and inner nose corners—especially if you have wider-set eyes.
Stop Leaks in 5 Minutes: Immediate Strap and Fit Adjustments
Perfect Your Strap Tension with Precision Measurements
The most common leak culprit is incorrect strap pressure. Your goggles need just 3-5 pounds of tension—enough to hold position without distorting the frame. Use the two-finger rule: adjust the strap so you can comfortably slide two fingers between the strap and your head. Y-back configurations reduce pressure points by 40% compared to single-strap designs. Remember: the strap’s job is positioning, not forcing the seal—your gasket creates the actual watertight barrier.
Master the Pre-Swim Seal Protocol
Follow this exact sequence before every swim:
1. Wet the gasket seal with clean water (never saliva)
2. Position goggles against your face without the strap
3. Apply gentle suction by inhaling through your nose
4. Confirm goggles stay in place for 3-5 seconds
5. Only then adjust the strap to maintain this seal
This prevents the common mistake of over-tightening to compensate for poor initial placement. If you have facial hair, trim it close around the eye sockets—stubble creates microscopic channels for water entry.
Fix Nose Bridge Leaks in Seconds
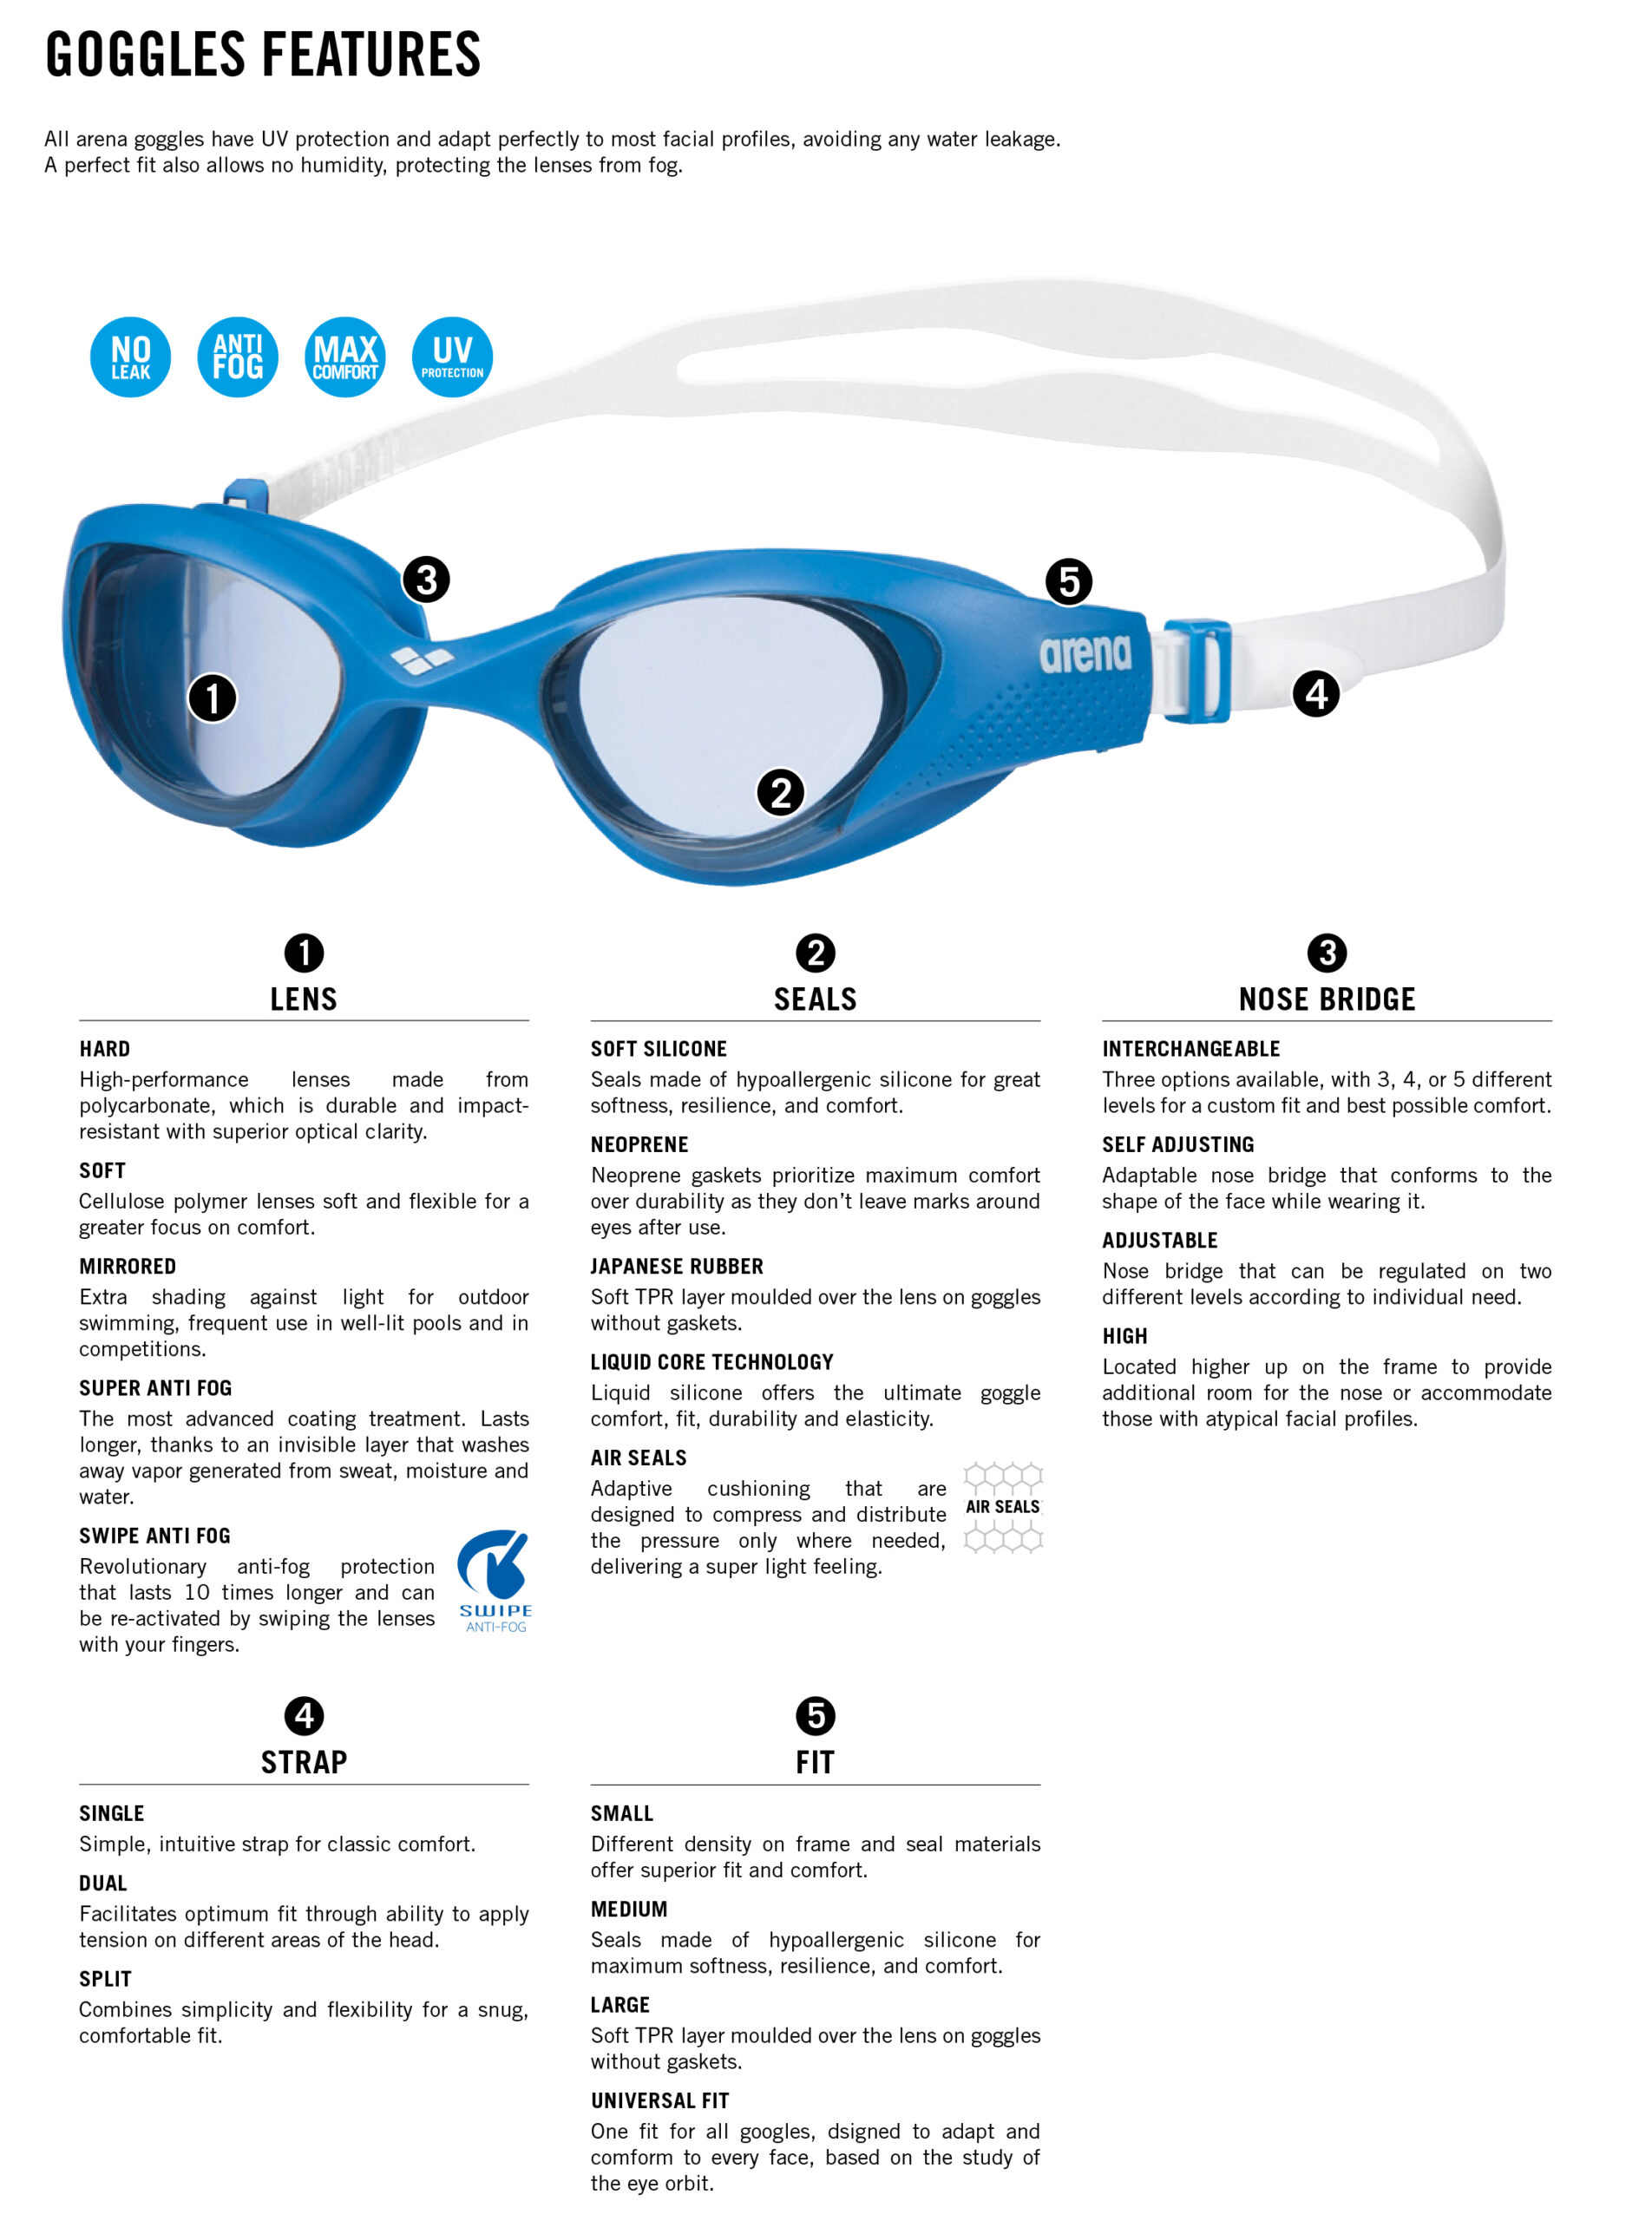
For leaks at the nose bridge, verify your interpupillary distance matches the bridge width. Gently squeeze the bridge area between thumb and forefinger—if it feels loose, you’ve found your problem. The Speedo Vanquisher 2.0’s adjustable bridge should allow 1-2mm of movement for thermal expansion. Position silicone nose pads to cover 80% of your nose contact area, ensuring even pressure distribution.
Gasket Revival: Restore Your Seal Without Replacement
Silicone Rejuvenation Protocol
Medical-grade silicone degrades from chlorine exposure and UV damage, but you can extend its life. Apply one drop of 100% pure silicone lubricant to a microfiber cloth and gently wipe the entire gasket. This fills micro-cracks and restores pliability. Never use petroleum-based products—they’ll permanently damage your silicone seal. Perform this treatment every 5-7 swims for optimal performance.
Deep Clean the Gasket Channel
Mineral deposits and skin oils create microscopic barriers between gasket and skin. Remove the gasket carefully (consult your manual for model-specific removal techniques), then clean the channel with isopropyl alcohol and a cotton swab. Inspect for debris in the dual-channel design of high-end models like the Speedo Vanquisher 2.0. When reinstalling, ensure no sections are pinched—especially at the top corners where leaks commonly originate.
When Replacement is Your Only Option: Advanced Repair Guide

Gasket Replacement Decision Tree
Ask these critical questions before attempting replacement:
– Does your model have serviceable gaskets? (High-end racing models often do)
– Is the frame damaged? (Cracks require full replacement)
– What’s your gasket’s Shore A hardness? (Over 40 indicates permanent hardening)
For models with replaceable gaskets like the Speedo Vanquisher 2.0, follow this protocol:
1. Remove old gasket using plastic prying tools (never metal)
2. Clean groove thoroughly with isopropyl alcohol
3. Apply silicone adhesive in a continuous bead around the rim
4. Press new gasket evenly, avoiding over-compression
5. Cure for 24 hours before testing
Most recreational goggles have integrated lens/gasket units—making replacement impractical. If your goggles fail the Seal Integrity Test (submerged at 0.5m for 60 seconds with bubble formation), replacement is more cost-effective than repair.
Prevent Future Leaks: Your Science-Backed Maintenance Schedule
Daily Leak Prevention Protocol
After every swim: Rinse goggles in distilled water—never tap water with mineral deposits. Pat dry with microfiber cloth (never paper towels). Store vertically away from direct sunlight, which degrades silicone 300% faster. Never wipe the interior anti-fog coating—this causes immediate fogging and reduces seal integrity.
Weekly Performance Optimization
Sanitize with diluted vinegar solution (1:10 vinegar:water ratio) to remove chlorine buildup. Inspect gaskets under 10x magnification for micro-tears—especially along the 14 contact points of the Speedo Vanquisher 2.0’s orbital bone structure. Apply manufacturer-recommended silicone protectant to maintain elasticity.
Monthly Diagnostic Testing
Perform the Submersion Test monthly to catch wear before swim day. Use food coloring in water to trace entry points during simulated use. Check your gasket’s compression set—if it shows more than 15% permanent deformation after 22 hours at 70°C, replacement is needed.
Choosing Leak-Proof Goggles: What Actually Works
When selecting new goggles, prioritize these leak-proof features:
– Adjustable nose bridges with 0.5mm increments (like Speedo Fastskin3)
– Dual-compound gaskets with softer silicone at the brow (1.5mm) and denser material at cheek areas (2.5mm)
– Hydrodynamic laminar flow channels that direct water away from the seal interface
– Multiple nose piece options to match your facial structure
Try goggles using the professional fitting protocol: they should hold a 30-second suction test, maintain seal during full neck rotation, and pass the Valsalva maneuver without breaking seal. Remember—proper fitting reduces leakage incidents by 89% compared to self-adjusted models.
Final Note: A properly maintained goggle should achieve 98.7% leak prevention. By implementing these diagnostic techniques and maintenance protocols, you’ll eliminate frustrating leaks and enjoy clear, comfortable vision throughout every swim. When prevention fails, you now have the exact knowledge to fix the problem—whether it’s a simple strap adjustment or complete gasket replacement. Your perfect seal is just one correct fix away.


