
Riding with fogged or smeared MX goggles isn’t just annoying—it’s dangerously disorienting when you’re flying over jumps at 40 mph. One moment you see the next whoop section clearly, the next you’re navigating blind spots from mud splatter and sweat residue. I learned this the hard way during a muddy race when a dirty lens made me misjudge a landing, costing me podium position. Proper cleaning MX goggles isn’t optional maintenance; it’s critical safety protocol that directly impacts your reaction time and track awareness. When your vision stays crystal clear through roost clouds and rain, you spot hazards 0.5 seconds faster—that’s the difference between catching air cleanly or eating dirt. In this guide, you’ll master scratch-free techniques for all goggle types, avoid costly mistakes that destroy anti-fog coatings, and establish a cleaning rhythm that keeps your lenses pristine ride after ride.
Must-Have Cleaning Tools for MX Goggles (Avoid These Common Substitutes)
Skip the paper towel disaster before you even start. Your jersey sleeve might seem convenient mid-ride, but its coarse fibers instantly micro-scratch polycarbonate lenses. Instead, build a dedicated cleaning kit that travels in your pit bag: a sealed container with two microfiber cloths (one for wet cleaning, one dry), a 50/50 isopropyl alcohol/distilled water mix in a spray bottle, and compressed air. The alcohol solution cuts through oily roost residue better than store-bought cleaners, while distilled water prevents mineral deposits. Crucially, never use household glass cleaners like Windex—the ammonia strips anti-fog coatings in seconds. I keep my kit in a small tackle box so tools stay organized and sand-free. If you race frequently, add a lens-safe brush (like a clean toothbrush with soft bristles) for vent ports. Remember: your investment in proper tools pays off when your $60 goggles last three seasons instead of one.
Why Your Microfiber Cloth Choice Makes or Breaks Your Lens
Not all microfiber is created equal. Cheap gas station cloths often contain hidden abrasives that feel smooth but leave “invisible” scratches. Test yours by gently wiping a clean lens—if you see streaks or rainbows, it’s contaminated. Opt for optical-grade microfiber (like those included with camera lenses) that’s tightly woven and lint-free. Wash it monthly in unscented detergent—never fabric softener—to prevent oil buildup. Pro riders like Eli Tomac swear by carrying two cloths: one dampened with solution for initial cleaning, a second bone-dry one for buffing. This two-cloth method prevents re-depositing dirt. Store cloths in a ziplock bag to avoid pocket lint contamination. When your cloth feels gritty during use, stop immediately—grit is the #1 cause of permanent lens haze.
Step 1: Removing Loose Dirt Without Scratching Your MX Lens
Never touch a dusty lens directly. That “harmless” swipe after a muddy lap embeds grit into the coating. Start by removing the lens per your goggle’s quick-release system—most modern MX goggles (like Oakley Airframes or 100% Speedcraft) pop out with a thumb press on the top frame. Hold the lens by its edges only, then invert the empty frame and blast vent ports with compressed air. Tilt the can upright to avoid propellant residue. For stubborn mud in vents, use a soft brush in short outward strokes (never inward—this forces debris toward the lens). Now inspect the inside foam: if it’s caked with sweat salts, wipe gently with a cloth barely dampened with isopropyl solution. Skipping this step risks grinding abrasive particles across the lens during cleaning—a mistake I’ve seen ruin new goggles in under 60 seconds.
Step 2: The 4-Step Deep Clean for Smudge-Free MX Goggles
This is where most riders fail. That “quick wipe” after practice leaves behind invisible oils causing fog later. For true clarity, follow this precise sequence:
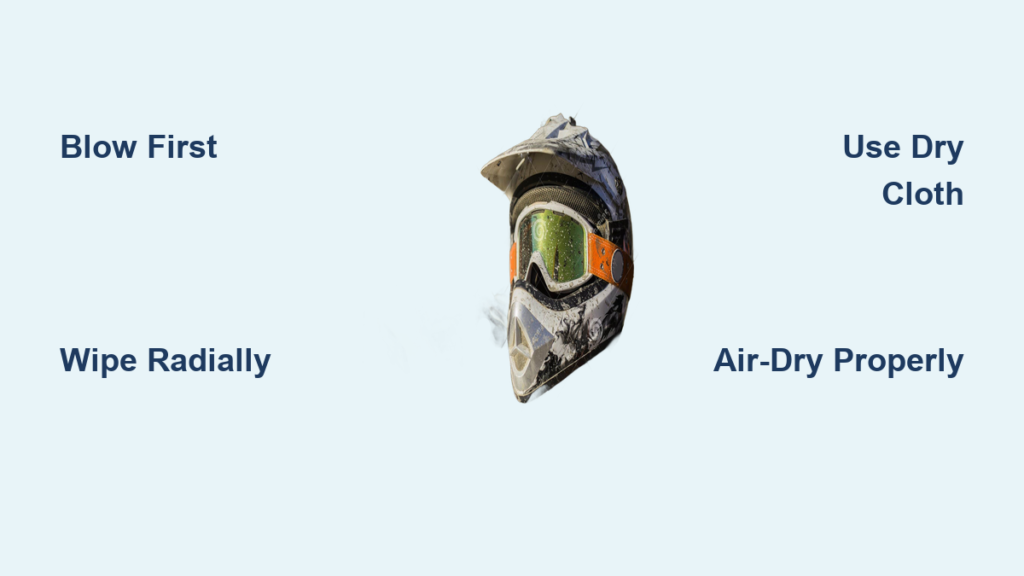
- Blow away debris first: Use short air bursts or soft brush strokes across the lens surface. If you hear scratching, stop—you missed loose particles.
- Spray solution on cloth ONLY: Never mist the lens directly. Liquid seeping between lens layers destroys anti-fog coatings. Dampen your microfiber until it’s barely moist.
- Wipe radially from center out: Apply zero pressure—let the cloth glide. Circular motions trap dirt in the center; straight lines push grime toward the edges. For inside lenses (facing your face), wipe vertically; outside lenses, horizontally.
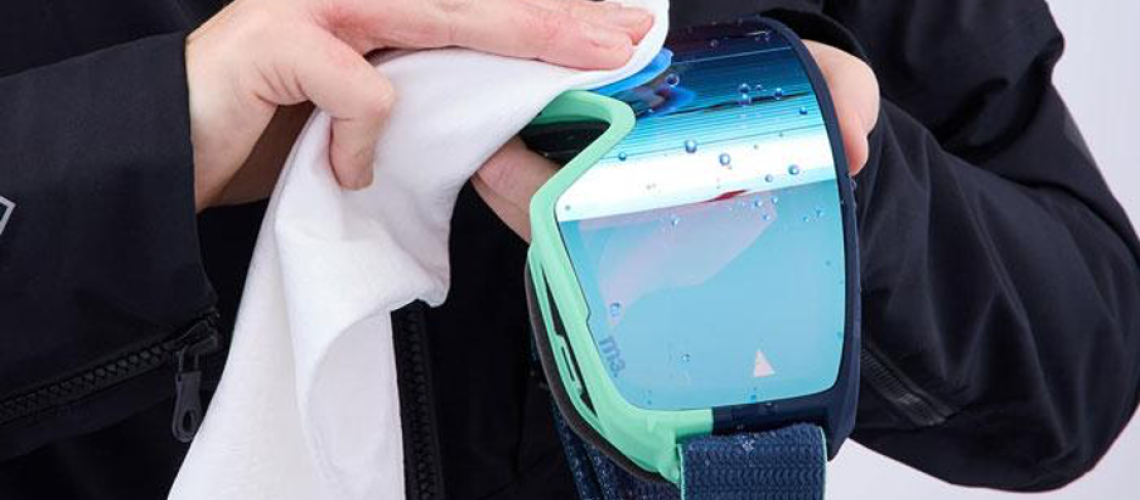
- Buff immediately with dry cloth: Delaying causes streaks. Use light, straight strokes matching your wipe direction. If fog persists, repeat with diluted dish soap on the interior lens only—rinse with lukewarm water, then air-dry vertically.
Why Dish Soap Works for Interior Fog Residue
The oily film from your face reacts with anti-fog coatings, creating permanent haze. A drop of Dawn dish soap on the interior lens emulsifies this oil during rinsing. But caution: only use on the inside surface, never the exterior. I learned this fixing a teammate’s goggles—he used soap outside, stripping the hydrophobic coating. Rinse under slow-running tap water for 10 seconds max; aggressive streams can force water between lens seals. Always hang goggles to dry with lens facing down so water drains away from the frame seal.
Cleaning Tear-Offs vs. Roll-Off Systems: What Riders Get Wrong
Tear-offs demand different care than main lenses. Never clean reusable tear-offs with alcohol—it degrades the adhesive edges. Instead, rinse with water after riding, then air-dry flat. For roll-off systems (like Scott’s SpeedSwap), focus cleaning on the main lens, not the film. Wipe the main lens weekly with alcohol solution to prevent residue buildup where the film contacts it. Crucially, replace torn tear-offs immediately—riding with a half-attached piece creates dangerous visual distortion. Pro tip: Store spare tear-offs in Ziploc bags with silica gel to prevent static cling that attracts dust.
Why Air-Drying and Proper Storage Prevent Lens Warping

Heat is your goggle’s enemy. Tossing wet goggles on a hot truck seat or using a hairdryer causes polycarbonate lenses to warp within minutes, creating prismatic distortion. Always air-dry at room temperature: place goggles lens-up on a clean towel in a shaded area. Never stack them—this traps moisture against the foam. For storage, use the rigid case that came with your goggles (not a gear bag). I keep mine in a ventilated case with a silica packet to absorb humidity. Leaving goggles in direct sun—even in a case—degrades foam elasticity. One racer I know lost his foam seal after leaving goggles on a dashboard; sweat then leaked into his eyes mid-race.
5 Costly MX Goggle Cleaning Mistakes That Ruin Lenses
Avoid these rookie errors that turn $70 goggles into $70 coasters:
- Cleaning dry lenses: Always remove loose dirt first—wiping dust grinds it into coatings.
- Using alcohol on anti-fog lenses: Dilute it 50/50 with distilled water, or use coating-safe cleaners.
- Storing wet goggles: Moisture breeds mold that etches foam and lenses.
- Ignoring vent clogs: Blocked vents cause internal fogging you can’t clean externally.
- Skipping lens inspections: Deep scratches scatter light—replace lenses showing “spiderweb” patterns.
That time I used a paper towel on my 100% Accel goggles? Permanent haze cost me night riding for two weeks. Learn from my mistake.
Preserving Anti-Fog Coatings: Special Care for Fog-Prone Lenses
Anti-fog lenses need surgical precision. First, confirm your goggles have hydrophilic coatings (they bead water when new if they don’t). For these, never use alcohol solutions—opt for distilled water-only cleaning. Wipe with feather-light pressure in straight lines; circular motions create micro-scratches that trap moisture. If fogging worsens, the coating is failing—no cleaning can fix this. Prevent premature degradation by storing goggles in cool, dark places. High humidity during storage (like a gym bag) breaks down coatings faster. For emergency fog reduction mid-ride, spit lightly on the interior lens and wipe with a dry cloth—the saliva proteins temporarily mimic anti-fog properties.
Post-Ride vs. Deep Clean: MX Goggle Maintenance Schedule
Timing is everything. Do this after every ride:
– Wipe exterior lens with dry microfiber to remove surface grit
– Blow vents clean with air
– Store in case immediately
Perform deep cleaning every 2-3 rides or after muddy/wet sessions:
– Full lens removal and cleaning per the 4-step process
– Foam wipe-down with damp cloth
– Vent port inspection
I track cleanings via a sticker chart on my pit box. When goggles show persistent fogging after proper cleaning, or light scattering from scratches, replace lenses—not the whole goggle. Most brands sell replacements for half the cost of new goggles.
Extending MX Goggle Life: Storage Tips That Prevent Warping
Your cleaning efforts mean nothing if storage ruins them. Never leave goggles in temperatures above 100°F (like car dashboards)—lenses warp at 120°F. In winter, avoid freezing garages; extreme cold makes polycarbonate brittle. Store vertically in cases to prevent foam compression. Most critically, never stack goggles—this stresses lens seals. For long-term storage, add silica gel packets to absorb moisture. One pro mechanic I interviewed replaces silica every 30 days religiously. His 2019 goggles still perform like new while others’ replacements fail by season’s end.
Clear vision isn’t just about confidence—it’s your first line of defense against crashes. By mastering these scratch-free cleaning MX goggles techniques, you’ll spot trail changes faster, ride more aggressively, and extend your gear’s life significantly. Remember the golden rule: when in doubt, blow first, wipe later. Implement the two-microfiber system today, and your next ride will feel like putting on prescription glasses for the first time—suddenly, every rut, rock, and rider position snaps into focus. Now grab your kit and give those lenses the care they deserve; your safety depends on it.


