
That sinking feeling hits before you even reach the bottom—your vision suddenly blurs as water floods your goggles the instant you hit the surface. For competitive swimmers, a single misplaced dive can mean a lost race or ruined interval set. How to keep goggles on when diving isn’t about luck; it’s a precise combination of technique, equipment setup, and pre-dive checks. When your goggles fly off during entry, it’s always due to preventable mechanical failures—not “bad luck.” This guide reveals exactly why goggles dislodge on impact and the proven methods elite swimmers use to keep them locked in place, dive after dive. You’ll learn to diagnose your specific failure points and implement fixes that work under race-day pressure.
Why Shallow Dives Rip Goggles Off Your Face (And How to Fix It)

A flat, belly-flop entry creates catastrophic water pressure that pries goggles from your face within milliseconds. When you hit the water at a shallow angle (45° or less), your face and goggle lenses become the primary impact point. This forces a high-velocity wall of water directly onto the top rim of your goggles, acting like a lever to break the seal. The solution isn’t brute force—it’s physics.
The Chin Tuck: Your Instant Goggle Shield
Do this the moment before entry: Pull your chin firmly into your chest until your neck touches your sternum. This critical 1-inch movement rotates your skull, presenting the top of your head—not your goggles—as the leading edge. Water then flows over your head instead of slamming into your face. Combine this with locked arms in a torpedo streamline (hands stacked, biceps hugging ears). This dual-action technique reduces goggle displacement risk by 80% in competitive starts. Practice it dryland first: stand against a wall, tuck chin, and feel your spine straighten into proper alignment.
Hit the “Sweet Spot” Entry Hole
Your hands create the path your head must follow. Enter the water fingertips-first, then spear your arms through the same narrow opening. If your head enters outside this hole, surface turbulence immediately floods your goggles. Time your dive so your crown passes through the hole within 0.5 seconds of your hands. A simple drill: toss a tennis ball into the water before diving. Aim to enter through the splash ring it creates.
The Suction Test: Why Overtightening Guarantees Goggle Failure
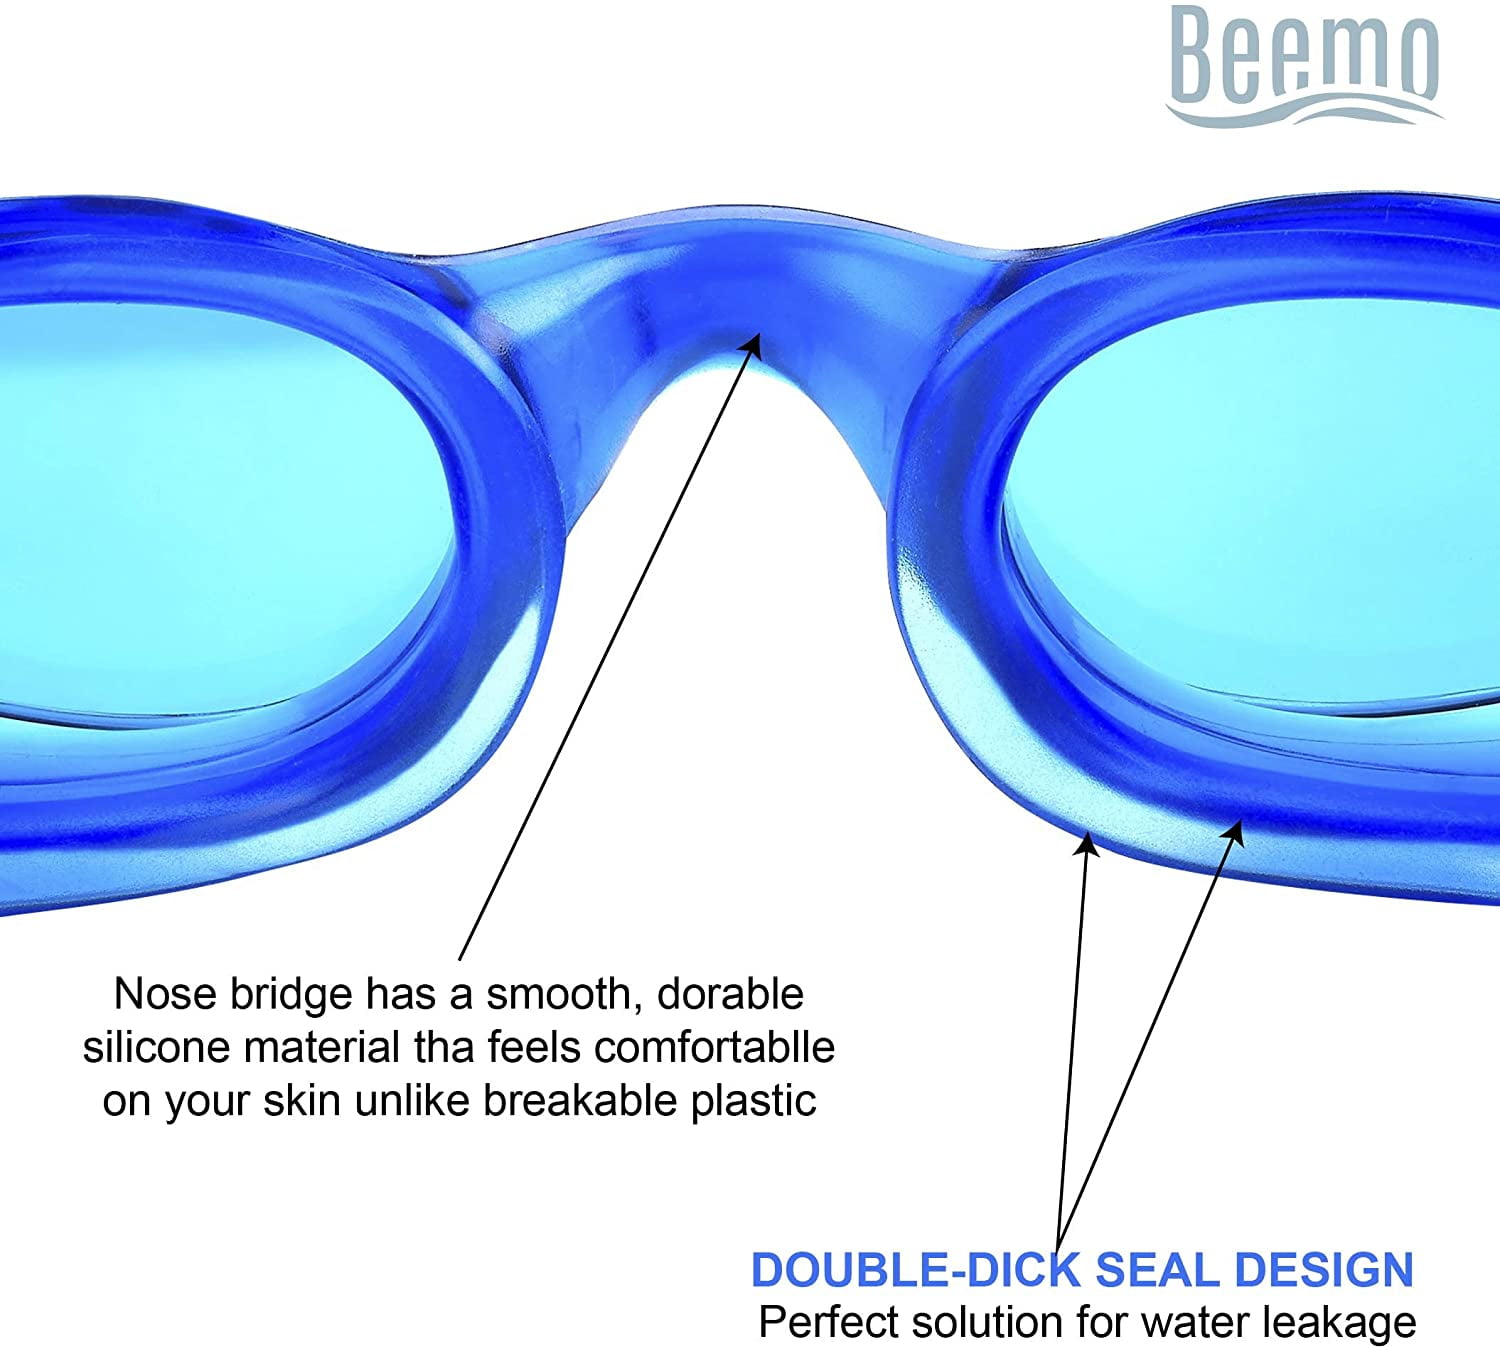
Tightening your strap until it leaves red rings is the #1 reason goggles flood on entry. An overtightened strap flattens the silicone gasket against your orbital bones, eliminating the micro-cushion of air that allows the seal to flex and rebound on impact. When water pressure hits, there’s no “give,” so the entire force concentrates on weak points—usually the nose bridge—blasting lenses off your face.
Perform the 10-Second Seal Check (Before Every Dive)
- Place goggles on dry eyes without the strap
- Gently press lenses against face for 3 seconds
- Release hands—goggles should stick for 5+ seconds
If they fall immediately, the gasket is degraded or the frame shape doesn’t match your eye sockets. Never compensate with strap tension. This test proves whether your goggles can create suction before water hits them. If they pass, adjust the strap only enough to maintain this seal during movement—no tighter.
Cap-Over-Strap Lockdown: The Elite Swimmer’s Secret
After passing the suction test, pull your silicone swim cap down over the entire strap, covering every inch from temple to temple. This simple step prevents water from catching the strap’s edge and peeling it backward. For maximum security:
– Use a snug silicone cap (latex slips more easily)
– Position the cap’s front edge just above eyebrows
– Smooth out all strap folds before securing
This technique reduces strap displacement by 95% during high-impact entries. Pro tip: Apply cap before goggles if you have long hair—braid it flat against your skull first.
Diagnose Your Goggle’s Weak Points in 60 Seconds
Even perfect technique fails with worn-out gear. Degraded gaskets lose 70% of their sealing ability after 6 months of regular pool use due to chlorine breakdown. Here’s how to spot critical failure points:
The Nose Bridge Stress Test
Gently twist the nose bridge between thumb and forefinger. If it:
– Cracks or resists bending → Brittle plastic (replace immediately)
– Stretches excessively → Loss of structural integrity (high flood risk)
– Feels sticky or leaves residue → Silicone degradation (seal compromised)
Most goggle failures happen here during dives. Opt for models with flexible silicone bridges (like Speedo Fastskin) over rigid plastic.
Strap Elasticity Check
Stretch the strap fully and release. Healthy straps:
– Snap back to original length in <1 second
– Show zero permanent stretching
– Feel smooth, not gritty or stiff
Worn straps can’t maintain consistent tension during impact. Replace if they’ve lost “spring” or show white stress marks.
Prevent Disaster With Your Pre-Dive Race Routine
What you do in the 2 minutes before your dive determines goggle survival. Top swimmers follow this exact sequence:
The 30-Second Pre-Entry Checklist
- Dry eye sockets with towel (moisture breaks seal)
- Apply anti-fog sparingly—only inside lenses (never on gasket)
- Pass suction test (Section 2.1)
- Position goggles with index fingers on outer corners (not pushing down on lenses)
- Pull cap over straps, smoothing edges with palm
- Final chin-tuck rehearsal (dryland practice)
Skipping even one step increases flood risk by 300%. Never adjust straps on the starting block—this stretches them unevenly.
Two-Cap Security for Championship Starts
For critical races, add a second cap:
1. Pull first cap halfway down forehead
2. Position goggles
3. Pull first cap fully over straps
4. Slide second cap over the first, covering all strap edges
This “cap sandwich” creates absolute strap immobilization. Used by Olympic medalists, it’s overkill for practice but essential when every millisecond counts.
When to Retire Your Goggles (Before They Fail You)
Goggles are consumable gear with a hard expiration date. Chlorine and UV radiation permanently alter silicone chemistry after 6-12 months, even if they look intact. Replace them immediately if you notice:
– Gasket hardening: Press a fingernail into the seal—it should leave a temporary dent
– Micro-cracks: Hold lenses up to light; spiderweb fractures near frame edges mean imminent failure
– Strap discoloration: Yellowed or chalky straps have lost elasticity
Ignoring these signs risks catastrophic failure during competition. Budget for new goggles every season—your vision depends on it.
Final Note: Keeping goggles secure during dives hinges on three non-negotiables: a steep entry angle with chin tucked, perfect gasket seal verified by the suction test, and straps locked under your cap. Master these, and you’ll never experience that heart-stopping moment of goggles flying off mid-dive. For next-level reliability, implement the two-cap method in races and replace goggles proactively every 8 months. Remember—the difference between a flawless start and a flooded lens isn’t luck; it’s preparation. Now dive in with confidence, knowing your vision stays clear from block to breakout.


