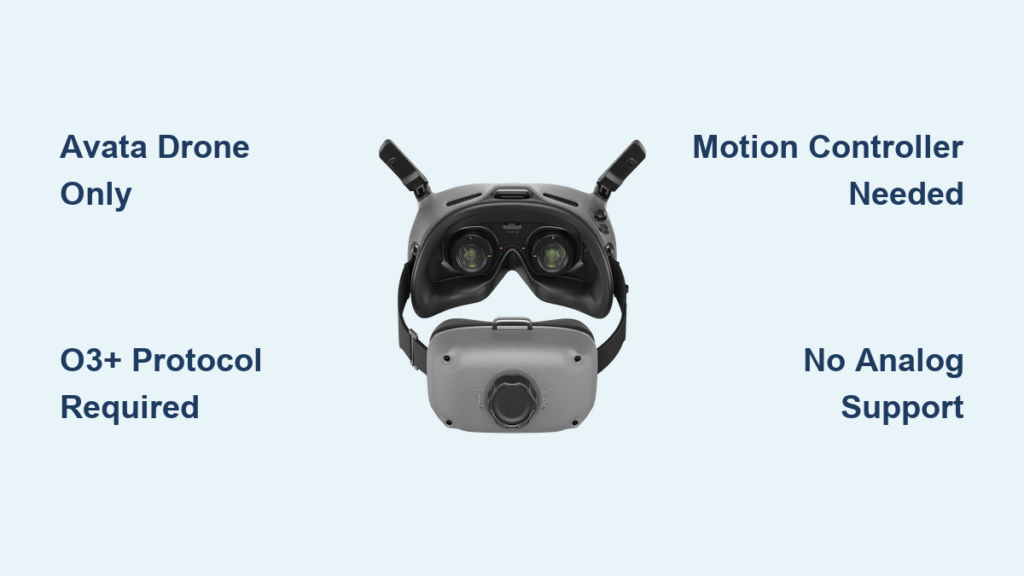
You unboxed your DJI Goggles Integra expecting seamless FPV immersion, only to face frustrating connection errors with your drone. This isn’t user error—it’s DJI’s tightly controlled digital ecosystem at work. Unlike universal FPV goggles, the Integra operates exclusively within DJI’s O3/O3+ transmission protocol, creating critical compatibility boundaries many pilots overlook. Goggles Integra compatibility hinges on precise hardware pairings, not guesswork. In this guide, you’ll discover exactly which drones, controllers, and accessories work—and which combinations will leave you grounded. We’ve verified every detail against DJI’s official specifications so you avoid costly mistakes before your next flight.
Understanding goggles Integra compatibility saves hours of troubleshooting and prevents dangerous mid-flight disconnects. The stakes are high: pairing with incompatible hardware causes video lag, signal loss, or complete system failure. By the end of this guide, you’ll confidently match your goggles to the right drone, controller, and accessories while leveraging built-in features like head tracking and DVR recording. Let’s cut through the confusion with actionable, verified compatibility insights.
Fly DJI Avata and O3 Air Unit Drones Without Issues
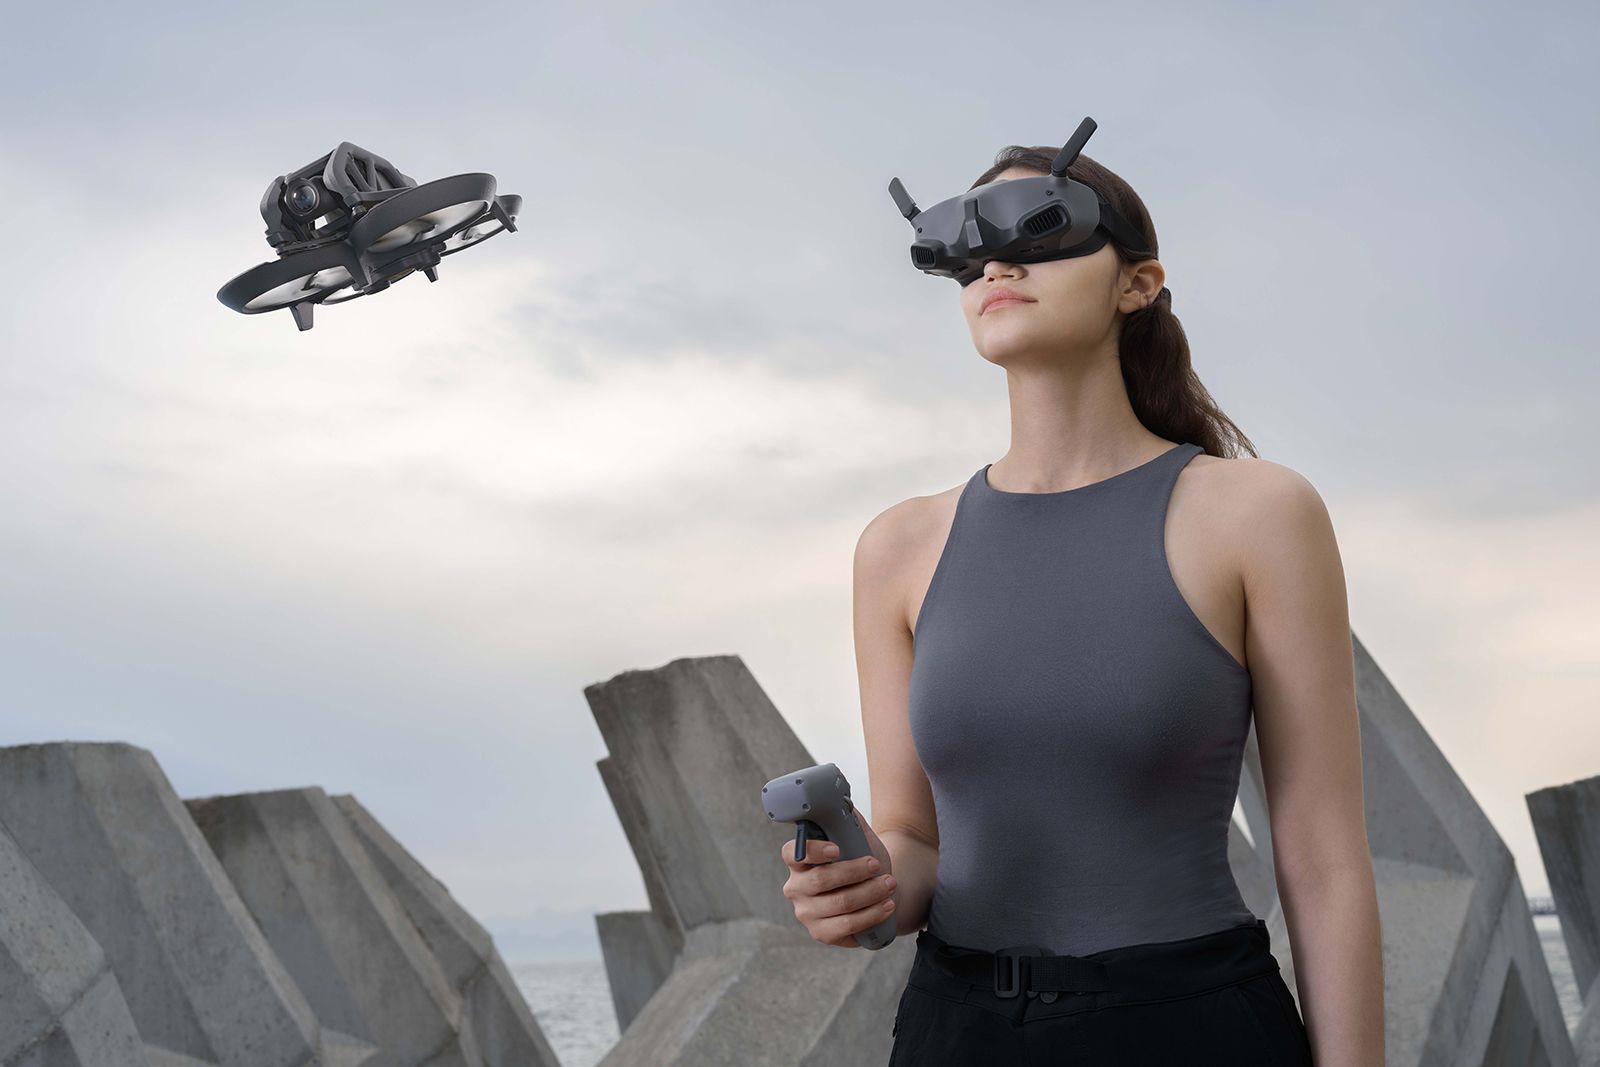
Your Goggles Integra deliver flawless performance with three specific drone configurations. The DJI Avata (Standard and Pro models) is the primary partner—no adapters or firmware hacks needed. When powered on near the Avata, the goggles auto-detect the O3+ transmission system and establish a 1080p/100fps feed with 30ms latency. This pairing unlocks head tracking when used with a DJI Motion Controller, letting you steer by moving your head.
For custom builds, the standalone DJI O3 Air Unit is your gateway to goggles Integra compatibility. Install it in 5″ or 7″ freestyle/racing drones to transmit HD video up to 10 km (FCC) in open areas. Crucially, the O3 Air Unit must be the naked version—not embedded in other systems. During setup:
– Ensure the air unit firmware matches the goggles (auto-syncs on first connection)
– Position antennas perpendicular to the drone body to minimize signal blockage
– Confirm dual-band operation (2.4/5.8 GHz) by checking the OSD signal strength indicator
The DJI FPV Drone (legacy model) works only with the DJI FPV Remote Controller 2. Never use the original motion controller—it forces O2 protocol, which the Integra rejects. After binding:
1. Power on goggles first, then drone
2. Select “DJI FPV” in the goggles’ device menu
3. Verify O3 protocol appears in OSD telemetry
Why Your FPV Drone Connection Fails With Old Controllers
If your legacy FPV drone won’t link, you’re likely using the wrong controller. The motion-controlled remote bundled with early FPV Drones transmits via O2 (Caddx Vista), incompatible with Integra’s O3+ system. The fix? Swap to the FPV Remote Controller 2—a $150 investment that restores full functionality. Test by checking the OSD: “O3” must appear next to “Video Format.” No physical modifications can bypass this protocol lock.
Avoid These Incompatible DJI Systems at All Costs
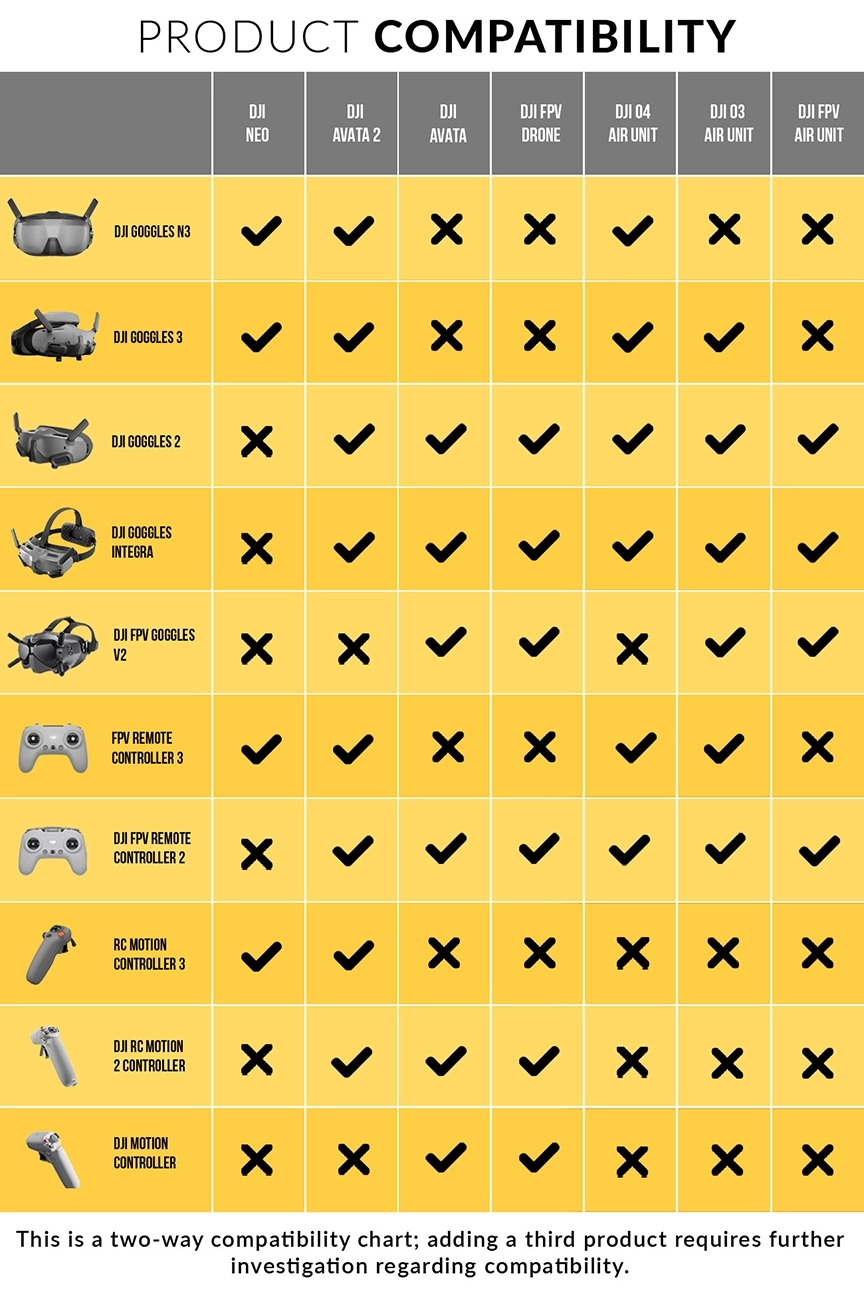
Your goggles won’t work with any hardware outside DJI’s O3/O3+ ecosystem. The DJI Avata 2 and its Goggles 3 use the newer O4 protocol—zero cross-compatibility exists. Similarly, DJI Goggles 2 (designed for Avata 2) and DJI FPV Goggles V2 (for legacy FPV drones) operate on different firmware branches. Attempting connections triggers error code “10007” (protocol mismatch).
Analog systems like Fat Shark or HDZero are physically incompatible. The Integra lacks analog receivers and HDMI input—no adapters can convert signals. Third-party digital systems (Walksnail, HDZero) also fail because DJI’s O3+ uses proprietary encryption. Even the DJI O2 Air Unit (Vista/Nebula Pro) won’t connect; it’s the predecessor to O3 with incompatible data framing.
Critical DIY Drone Build Mistake to Avoid
Pilots often assume the O3 Air Unit works in all custom frames. Reality check: If your drone uses a flight controller without O3-specific passthrough (like Betaflight 4.4+), video transmission fails. Verify your FC supports “DJI O3” in the video transmitter settings. Never mount the air unit under carbon fiber—metallic materials block 5.8 GHz signals, cutting range by 60%.
Pairing the Right DJI Controller With Goggles Integra
Head tracking only activates with motion controllers—not joysticks. The DJI RC Motion 2 (for Avata Pro) and original Motion Controller (for Avata Standard) are mandatory for head-controlled yaw. During binding:
1. Power on motion controller first
2. Hold “C1” and “C2” buttons for 3 seconds
3. Select controller type in goggles menu
The DJI FPV Remote Controller 2 works for traditional stick flying but disables head tracking. Never use DJI RC 2 or RC Motion 2—these are for Mavic/Air drones and won’t bind. Third-party transmitters (like TBS Crossfire) require PWM adapter cables and only function in manual mode with limited telemetry.
Why Your Motion Controller Isn’t Enabling Head Tracking
If head movements don’t steer your Avata, check two things:
1. The goggles’ “Head Tracking” toggle is enabled (Settings > Display)
2. You’re not using the FPV Remote Controller 2 simultaneously
Head tracking deactivates automatically when a joystick controller is bound. Reset by unbinding all controllers and re-pairing the motion controller first.
Adjusting Goggles Integra for Perfect Vision and Comfort
Skip the optometrist—built-in diopter adjustment (-8.0 to +2.0 D) accommodates most prescriptions. Rotate the lens dials while viewing a distant object until edges snap into focus. For astigmatism, DJI’s prescription lens service (clip-on modules) is essential—standard diopters won’t correct cylindrical errors.
IPD adjustment (56–72 mm) prevents double vision. Measure your pupil distance with a ruler, then:
1. Power off goggles
2. Rotate the IPD dial under the front panel
3. Aim for a single, circular image when viewing grid patterns
The facial foam is washable; replace it every 6 months to prevent skin irritation during long sessions.
How Goggles Integra Achieve 30ms Latency and 10km Range

O3+’s dual-band transmission (2.4/5.8 GHz) automatically switches frequencies to avoid interference. In urban areas, 5.8 GHz dominates for lower latency; open fields default to 2.4 GHz for range. Maximize distance by:
– Flying above ground clutter (trees/buildings)
– Keeping antennas parallel to the drone
– Using Focus Mode (Settings > Display) to narrow FOV during long-range flights
The microSD slot enables DVR recording of your OSD view—critical for analyzing crashes. Insert a U3-rated card (up to 512GB), then press the record button on the side. Footage saves at 1080p/60fps with flight telemetry overlaid.
Critical Goggles Integra Limitations Pilots Must Know
These goggles cannot function as PC VR headsets—no SteamVR or simulator support outside DJI’s Virtual Flight app. The lack of HDMI input means you can’t use them for gaming or media. Crucially, analog-to-digital converters (like HDZero’s) won’t work; DJI’s encryption blocks external video sources.
Battery life caps at 2 hours due to the integrated 2450 mAh cell. You can’t hot-swap batteries during events—use a USB-C power bank for extended sessions. Also, the 44° FOV is narrower than analog goggles (50°+), creating a “tunnel vision” effect some pilots find disorienting.
One-Minute Goggles Integra Compatibility Verification Guide
Before flying, run this checklist:
| Component | Compatible? | Verification Step |
|---|---|---|
| Drone | DJI Avata / O3 Air Unit | OSD shows “O3+” or “O3” |
| Controller | Motion Controller 1/2 or FPV Remote 2 | No “Controller Error” in OSD |
| Transmission | Dual-band (2.4/5.8 GHz) | Signal strength > 80% at 100m |
| Recording | microSD inserted | “REC” icon appears when recording |
If your Avata 2 won’t connect, you’ve hit the O4/O3+ wall—no firmware update fixes this. Similarly, FPV Goggles V2 pairing attempts fail because they use O3 without + enhancements. When in doubt, reset goggles to factory settings (Settings > System > Restore) before re-pairing.
Final Note: Master goggles Integra compatibility by respecting DJI’s ecosystem boundaries. Always confirm O3/O3+ support before purchasing drones or accessories—never assume backward compatibility. Update firmware via DJI Assistant 2 monthly to maintain optimal performance. For custom builds, prioritize frames with O3 Air Unit mounting points and carbon fiber-free signal paths. With these verified pairings, you’ll unlock the Integra’s full potential: sub-30ms latency, 10km range, and immersive FPV without guesswork. Keep this guide bookmarked for your next equipment upgrade—it’s the difference between seamless skies and grounded frustration.