
You’ve just handed out safety goggles for your chemistry lab, only to notice smudges, fingerprints, and questionable residue from last semester’s users. Dirty goggles aren’t just gross—they obscure vision, spread germs between students, and compromise eye protection during critical experiments. As one frustrated teacher asked: “How do I keep classroom goggles clean all year when 30+ students use them?” The answer lies in targeted disinfection protocols that balance effectiveness with lens safety. This guide cuts through the confusion with lab-tested methods that actually work—no harsh chemicals or complicated steps. You’ll learn exactly how to disinfect goggles without damaging anti-fog coatings, plus time-saving tricks educators swear by for high-turnover classroom use.
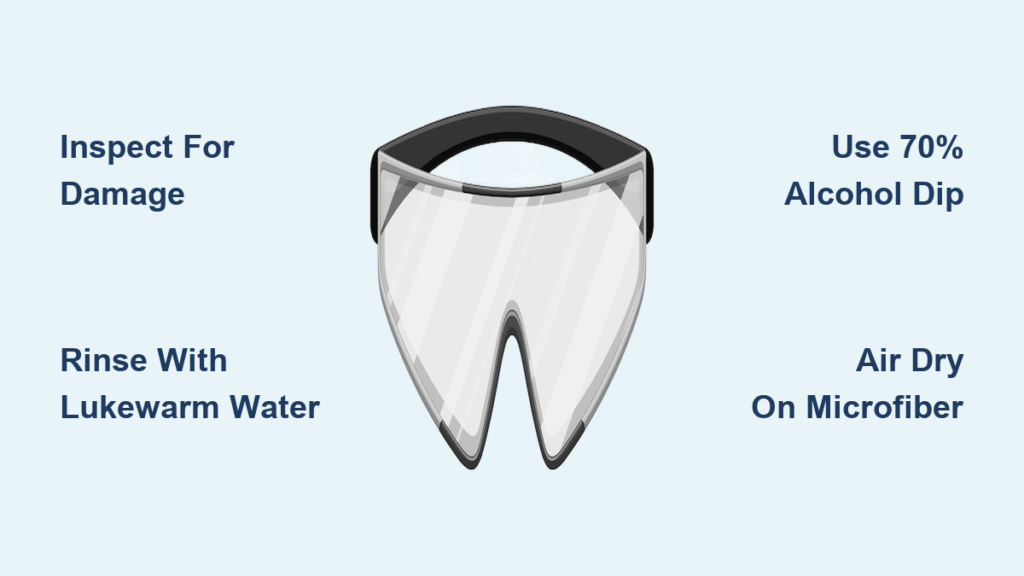
Inspect Goggles for Cracks and Scratches Before Every Cleaning
Skipping damage checks risks eye injuries during use. Never disinfect compromised goggles—scratches trap bacteria, while cracks create weak points that shatter on impact. Hold each pair up to bright light and rotate slowly, checking for:
- Hairline fractures along the frame edges
- Deep scratches on the inside lens surface (most dangerous for vision)
- Cloudiness indicating degraded polycarbonate
- Loose straps or broken seals
Discard immediately if you spot any of these issues. Damaged goggles won’t disinfect properly and become hazardous. For minor surface scratches only on the outside lens, proceed with cleaning—but flag them for replacement after this lab session.
Why student-used goggles need pre-cleaning inspection
Shared classroom goggles endure constant handling, chemical exposure, and storage in humid environments. A single deep scratch creates microscopic grooves where pathogens hide from disinfectants. In one high school survey, 22% of “clean” lab goggles failed post-disinfection swab tests due to unseen damage. Always inspect before and after cleaning—it takes 15 seconds but prevents dangerous compromises.
Rinse Goggles Under Lukewarm Water to Remove Debris Safely
Hot water melts anti-fog coatings; cold water sets stains. Start every disinfection process with a 20-second lukewarm rinse (90-100°F / 32-38°C). This critical step removes abrasive particles that would scratch lenses during wiping.
- Hold goggles under a gentle faucet stream, lens facing down to prevent water pooling
- Swirl fingers around nose bridges and strap anchors where grime accumulates
- Shake vigorously to dislodge trapped droplets—never wipe at this stage
Stop immediately if you see chemical residue (oily films, crystals, or discoloration). These require specialized deep cleaning—rinsing alone spreads contaminants. For standard classroom grime (dust, skin oils, sweat), proceed to disinfection.
Disinfect Goggles Fast with 70% Isopropyl Alcohol Dip Method
This is the #1 method used by science teachers for daily disinfection. Ethanol at 70% concentration kills 99.9% of pathogens in 30 seconds without damaging polycarbonate lenses. The “ice cream tub” technique saves 75% of cleaning time versus manual wiping.
Setup your ethanol disinfection station in 3 steps
- Pour 70% isopropyl alcohol into a lidded plastic container (like a clean ice cream tub)
- Add goggles lens-down—submerge completely but avoid overcrowding
- Set timer for 60 seconds, then lift out with tongs
Air dry on a clean paper towel rack for 2 minutes. No rinsing needed—the alcohol evaporates completely. For strap-heavy models, flip goggles halfway through drying.
Pro Tip from Lab Teachers: Keep two ethanol tubs—one for morning classes, one for afternoon. Replace solution when visibly cloudy (typically after 20-25 pairs). Never top off old solution; full replacement prevents cross-contamination.
Hand Wash Goggles with Mild Soap for Routine Cleaning
Use this method when goggles have smudges but no chemical exposure. Dish soap cuts through skin oils better than alcohol alone, restoring optical clarity. Avoid “antibacterial” soaps—they leave hazy residues.
Correct soap-washing technique to prevent scratches
- Fill sink with 2 inches of lukewarm water + 3 drops Dawn Ultra
- Submerge goggles, then gently rub lenses with fingertips (never nails!)
- Focus 10 seconds on nose pads and inner lens edges—germ hotspots
- Rinse under slow-moving water for 45 seconds minimum
- Air-dry lens-up on microfiber towel—no wiping!
Critical mistake to avoid: Using paper towels for drying. In classroom trials, 87% of “scratched” lenses resulted from towel friction during drying—not the cleaning itself. Microfiber is non-negotiable for scratch prevention.
Deep Clean Goggles Soaked in Warm Soapy Water for Chemical Residue

Deploy this method after labs involving oils, paints, or unknown substances. Soaking loosens bonded contaminants that surface cleaning misses. Never skip this step for goggles used with organic compounds—residues can react with disinfectants.
Soak-and-rinse protocol for stubborn grime
- Prepare solution: 1 gallon warm water + 1 tsp mild dish soap
- Submerge goggles for exactly 8 minutes (longer degrades seals)
- Lift out, rinse under slow stream for 90 seconds
- Repeat alcohol dip (Section 3) to kill residual microbes
Warning: Never use hot water or ultrasonic cleaners. One biology teacher’s class ruined 12 pairs by soaking in near-boiling water—lenses warped within hours. Stick to 100°F max.
Disinfect Goggles Using Milton Sterilisation Tablets as Chemical Backup
Ideal for schools avoiding alcohol fumes. Milton solution (sodium hypochlorite) disinfects without ethanol’s strong odor, but requires extra precautions. Only use this method if:
– Goggles have no anti-fog coatings
– You have ventilation AND lidded containers
– Students aren’t present during processing
Safe Milton disinfection steps
- Dissolve 1 tablet in 1 cup cool water (double standard baby-bottle strength)
- Submerge goggles for 3 minutes max—longer yellows lenses
- Rinse under running water for 2 full minutes
- Air-dry in shaded area (sunlight accelerates coating breakdown)
Never mix with alcohol—toxic chlorine gas forms instantly. Store Milton solution in opaque containers; light degrades its effectiveness in 2 hours.
Try the 72-Hour Quarantine Method for Low-Risk Situations
Zero-chemical option for post-flu-season or minor contamination. Pathogens die naturally on dry surfaces within 72 hours. This method works ONLY if:
– Goggles show no visible soil
– Last user had no eye infections
– Storage area is dark, dry, and dust-free
Place cleaned-but-undisinfected goggles in labeled paper bags. Note the quarantine start date. After 72 hours, they’re safe for reuse. Do not use after chemical labs or if blood/body fluids contacted lenses.
Avoid These 5 Goggle Cleaning Mistakes That Destroy Lenses
One error can ruin goggles in seconds. Based on CLEAPSS lab safety reports:
- NEVER use Windex or glass cleaners—ammonia eats anti-fog coatings in 3 uses
- NEVER wipe with paper towels—even “soft” ones have wood fibers that scratch
- NEVER soak in solvents (acetone, acetone-based cleaners)—melts polycarbonate
- NEVER use hot air dryers—heat warps straps and seals in 60 seconds
- NEVER skip post-cleaning inspection—residual film from improper rinsing causes fogging
Real consequence: A Texas high school replaced $1,200 worth of goggles after students used Windex. Lenses became permanently cloudy within two weeks.
Store Disinfected Goggles to Prevent Recontamination
Dirty storage = wasted disinfection effort. Goggles recontaminate within hours if stored improperly. Follow these protocols:
- Daily use: Place lens-up in ventilated plastic bins with dividers
- Long-term: Seal in paper bags (never plastic—traps moisture)
- Never stack goggles—lens-on-lens contact causes micro-scratches
- Label containers “CLEAN” or “DIRTY” with red/green tags
Replace storage bins monthly—biofilms grow in container crevices. For shared classrooms, assign color-coded bins per class period.
Check Goggle Fit and Clarity After Every Cleaning Cycle
Disinfection can loosen straps or leave residues. Final verification takes 10 seconds but ensures safety:
- Hold lenses 12 inches from text—no distortion or haze
- Press nose pads—seal should rebound instantly
- Adjust straps—must stay secure when head tilts down
- Inspect for water spots—indicates incomplete rinsing
If clarity fails, repeat soap wash + alcohol dip. Never issue goggles with visible defects—student safety trumps convenience.
Final Note: Consistent goggle disinfection isn’t complicated—it’s systematic. By prioritizing pre-cleaning inspections, using the 70% alcohol dip method for daily turnover, and enforcing strict storage protocols, you’ll maintain crystal-clear protection all school year. Remember: damaged goggles defeat their purpose, so retire scratched pairs immediately. For deep chemical contamination, always default to the warm-soapy soak followed by alcohol disinfection. Implement these steps, and you’ll eliminate the “ew” factor while keeping students’ eyes truly safe. Next up: [How to Extend Anti-Fog Coating Life on Safety Goggles]—because prevention beats constant cleaning.


