
That moment when flat light suddenly hits the slopes or blinding glare ruins your descent—your Giro Dylan goggles are only as good as their lenses. When conditions shift, swapping to the right lens isn’t optional; it’s your ticket to seeing every bump and turn clearly. With Giro’s injection-molded cylindrical lenses featuring Optics by ZEISS® and anti-fog coating, you’re equipped for any mountain scenario. But if you’ve ever fumbled with a stubborn lens change mid-run, you know improper technique risks scratches, misalignment, or fogged vision. This guide cuts through the frustration, showing exactly how to change Giro Dylan goggle lenses safely and efficiently—so you spend less time fixing gear and more time riding.
Unlike cheap knockoffs, Giro Dylan lenses demand precise handling to protect their advanced anti-fog coating and optical clarity. Rushing the swap with dirty hands or improper pressure can permanently compromise performance. The good news? With the right approach, lens changes take under 60 seconds and become second nature. Whether you’re prepping for a stormy day with Rose Silver tints (like the GR-8041456 model) or switching to sunny-day shades, this process preserves your investment. By the end, you’ll confidently execute flawless lens swaps that maintain your goggles’ factory seal and crystal-clear view—no more guessing or googling mid-mountain.
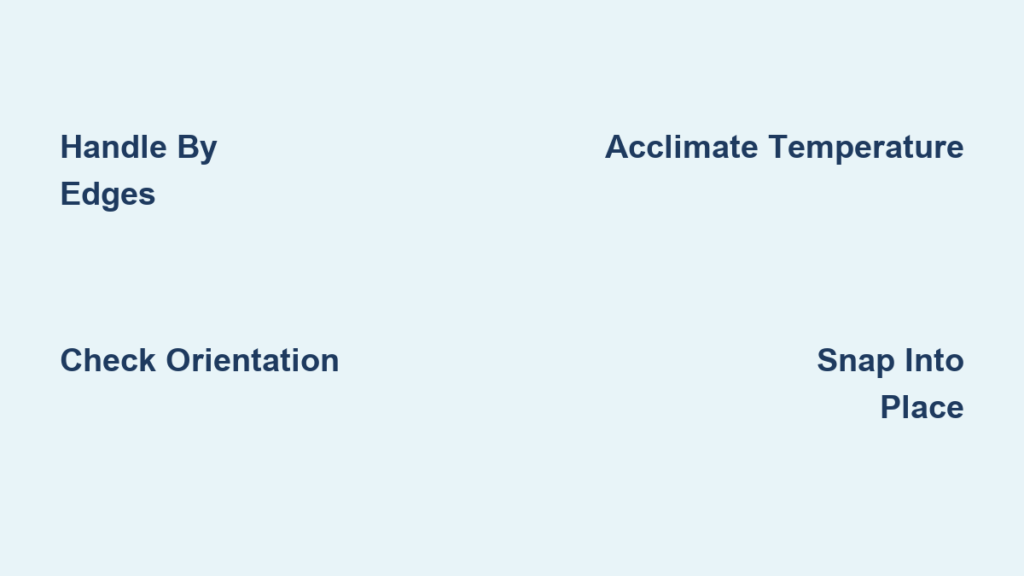
Essential Workspace Setup for Scratch-Free Lens Changes
Your kitchen counter isn’t goggle surgery. Before touching a single lens, create a controlled environment to prevent costly damage. Clear a soft, lint-free surface like a microfiber towel—never glass, wood, or carpet where debris hides. Wash hands thoroughly with non-moisturizing soap to eliminate skin oils that degrade anti-fog coatings, then dry completely. Lay out your replacement lens (e.g., the Rose Silver GR-8041456 model) and a dedicated microfiber cloth before removing the old lens.
Critical mistake to avoid: Skipping this prep invites micro-scratches. Oils from your skin bond to the lens surface, creating fogging hotspots that washing won’t fix. If you’re changing lenses outdoors, shield your workspace from wind-blown grit using your snowboard or a gear bag. Always handle lenses by the extreme edges—not the optical surface—to protect the injection-molded cylindrical curvature. This 30-second setup prevents 90% of common replacement errors, keeping your Optics by ZEISS® performance intact.
Why Temperature Matters During Lens Swaps
Cold lenses become brittle and prone to cracking. If your goggles came straight from a freezing car trunk, wait 10 minutes for them to acclimate to room temperature. Never force a lens change when materials are below 40°F (4°C)—the frame’s flexibility plummets, risking snapped retaining clips. Conversely, excessive heat (like near a heater) warps the nylon frame. Ideal conditions? 60-75°F (15-24°C) with low humidity. If you’re racing against a weather change, tuck goggles inside your jacket for 5 minutes to gently warm them. This prevents stress fractures in the lens gasket that cause fogging later.
Dylan Goggle Frame Mechanics Explained
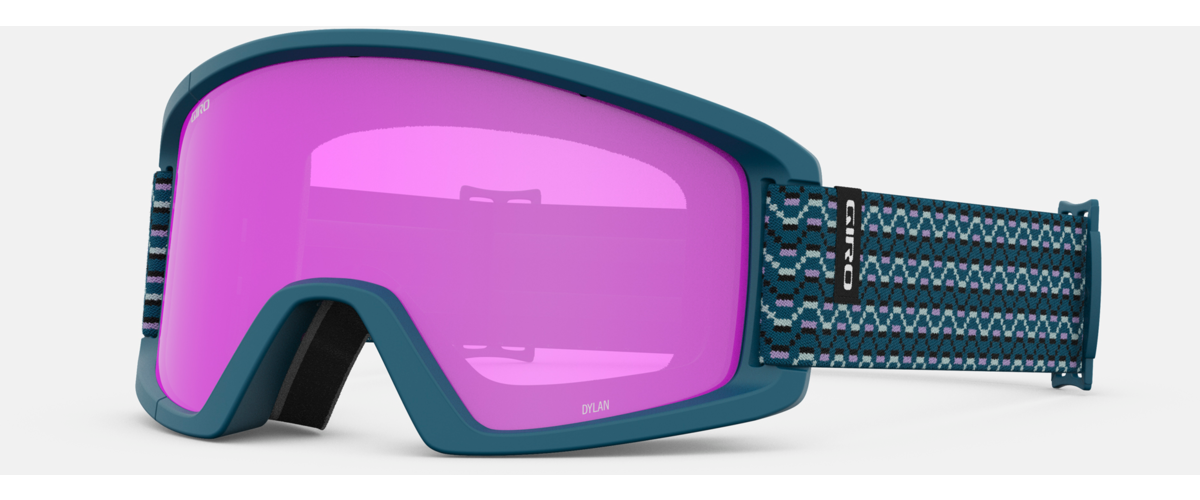
Your Giro Dylan isn’t just plastic—it’s an engineered system where frame and lens interlock precisely. The frame features subtle internal tabs along the bottom edge and a flexible top clip designed for cylindrical lens retention. Notice the slight asymmetry: the nose bridge curves inward more sharply than the temple side, ensuring optical alignment with your face. This isn’t arbitrary; ZEISS® optics require exact positioning to eliminate peripheral distortion.
Identifying Your Lens Orientation
Every Giro Dylan lens has a directional design. Hold it with the curved nose bridge facing you—the wider temple side should angle slightly outward. If installed upside down (a surprisingly common error), the lens won’t seat fully, creating gaps that invite fog and snow. Check for tiny mold markings near the nose piece; these should point downward when correctly positioned. The anti-fog coating’s integrity depends on this alignment—reverse installation exposes untreated edges to moisture.
Step 1: Removing the Old Lens Without Damage
Time estimate: 20 seconds | Difficulty: Easy (with technique)
Grip the frame firmly at the temple areas with both hands—never squeeze the lens itself. Place thumbs inside the goggle cavity at the 3 and 9 o’clock positions. Apply even, outward pressure along the bottom edge while maintaining upward tension. You’ll feel the lens release from the lower tabs with a soft pop—stop immediately if resistance exceeds gentle thumb pressure. Forcing it cracks the lens or warps the frame. Once the bottom edge clears, lift the lens upward in a smooth arc like opening a book. If stuck, rotate pressure points slightly; never pry with tools.
Troubleshooting Stuck Lenses
If the lens won’t budge after 3 attempts:
– Check for ice/debris: Tap the frame lightly against your palm to dislodge packed snow
– Warm the gasket: Breathe warm air onto the seal for 5 seconds to increase flexibility
– Reposition thumbs: Move pressure points 1/2 inch toward the nose bridge where tabs are shallower
Never use knives, credit cards, or fingernails—these scratch lenses and compromise the anti-fog layer. If still stuck, pause and let goggles acclimate; forcing it risks permanent frame damage.
Step 2: Preparing Your New Giro Dylan Lens
Time estimate: 15 seconds | Difficulty: Very Easy
Hold the replacement lens (e.g., Rose Silver GR-8041456) by its outer edges only. Inspect for shipping dust under bright light—cylindrical lenses hide particles in their curve. Gently wipe the entire surface with a dry microfiber cloth using straight strokes (no circles!). Pay special attention to the inner surface where anti-fog coating lives; fingerprints here cause permanent fogging spots. Verify the lens isn’t upside down by checking the nose bridge curvature—it should mirror your facial contour.
Critical Anti-Fog Coating Protection
The Optics by ZEISS® anti-fog layer is sacrificial—it degrades with improper cleaning. Never:
– Use saliva, clothing, or paper towels (they contain abrasives)
– Spray cleaners directly onto the lens (chemicals seep into edges)
– Store lenses loosely in gear bags (microfiber pouches only)
One contaminated swap can ruin coating effectiveness. If your new lens has a protective film, peel it off slowly at a 45-degree angle before installation.
Step 3: Installing the New Lens for a Fog-Proof Seal
Time estimate: 25 seconds | Difficulty: Moderate (precision required)
Align the lens with the frame’s top clip first. Tilt the frame slightly downward and press the lens’s upper edge into the retaining channel until it clicks. Keeping thumbs at the nose bridge, apply downward pressure along the bottom edge while sliding fingers outward toward the temples. You’ll hear a series of soft snaps as the lens engages each tab—this should require minimal force. The final test: hold goggles up to light and check for consistent gaps. A proper seal shows zero light leakage between lens and frame.
Perfecting the Snap Technique
If the lens won’t seat:
1. Recheck orientation: Upside-down lenses never seal fully
2. Flex the frame: Gently bend temples outward 5 degrees to widen the gap
3. Seat corners first: Press temple-side tabs before the nose bridge
Stop after 3 attempts—repeated forcing cracks the lens gasket. A correctly installed lens feels flush with the frame, with no visible edges catching light.
Common Installation Errors That Cause Fogging

Forced alignment is the #1 mistake—Giro Dylan frames don’t require hammering. If resistance exceeds the pressure needed to crack an eggshell, realign immediately. Edge handling leaves oils that create fog rings around your pupils. Skipping debris checks lets microscopic grit scratch lenses during insertion, scattering light like a dirty windshield. Worst offender? Ignoring temperature: Cold lenses expand when warmed on your face, breaking the seal and inviting fog. Always acclimate lenses 10 minutes before swapping.
Post-Installation Fit Verification
Don’t assume it’s done after the snap. Run a fingertip along the inner lens-frame seam—any bumps mean misalignment. Wear the goggles and shake your head vigorously; the lens shouldn’t shift or make noise. Check vision through every angle: peripheral distortion indicates upside-down installation. Finally, breathe heavily into the goggles for 10 seconds—condensation should vanish in under 5 seconds if the anti-fog coating is intact and the seal is perfect. If fog lingers, reseat the lens; trapped moisture degrades coating long-term.
Preserving Your Lens Investment Long-Term
After each ride, wipe lenses with a dry microfiber cloth while holding them by the edges. Never clean when frozen—thaw first. For stubborn salt residue, use lens-specific spray on the cloth (not the lens) and wipe gently. Store goggles in the included microfiber bag with the lens facing up—never stacked under other gear. Every 5 swaps, inspect frame tabs for cracks; damaged tabs cause recurring fogging. With proper care, your GR-8041456 Rose Silver lenses maintain Optics by ZEISS® clarity for 2+ seasons.
When to Swap Giro Dylan Lenses Proactively
Don’t wait for disaster. Replace lenses immediately if:
– Scratches cover >10% of the surface (distorts depth perception on jumps)
– Anti-fog coating fails (persistent fog after wiping)
– Color clarity degrades (lenses look hazy even when clean)
Also swap proactively for conditions: Rose Silver for flat light, dark tints for glare, yellow for dawn/dusk. Keeping two lens types on hand—like the 50%-off GR-8041456 Rose Silver—ensures you’re never caught blind-sided by weather shifts.
Mastering how to change Giro Dylan goggle lenses transforms your safety and performance on the mountain. With these precise steps, you protect your investment in Optics by ZEISS® clarity while adapting instantly to changing conditions. Remember: gentle pressure, edge-only handling, and temperature awareness prevent 95% of common issues. Now that your lens swaps are foolproof, focus where it matters—carving fresh lines with unobstructed vision. Keep this guide bookmarked, and your next lens change will feel as natural as clicking into bindings.


