
Your ski goggles sliding down your nose mid-run or letting icy wind blast through forehead gaps can turn fresh powder into a miserable experience. Fogged lenses from improper seals not only ruin visibility but create dangerous blind spots on steep terrain. Whether you’re racing through moguls or cruising groomers, a snug, gap-free fit is non-negotiable for safety and performance. This guide delivers precise, field-tested adjustments to tighten ski goggles correctly—no tools required. You’ll learn exactly how to position straps, eliminate forehead gaps, and achieve that elusive “locked-in” feel that survives 30mph winds and full-day sessions.
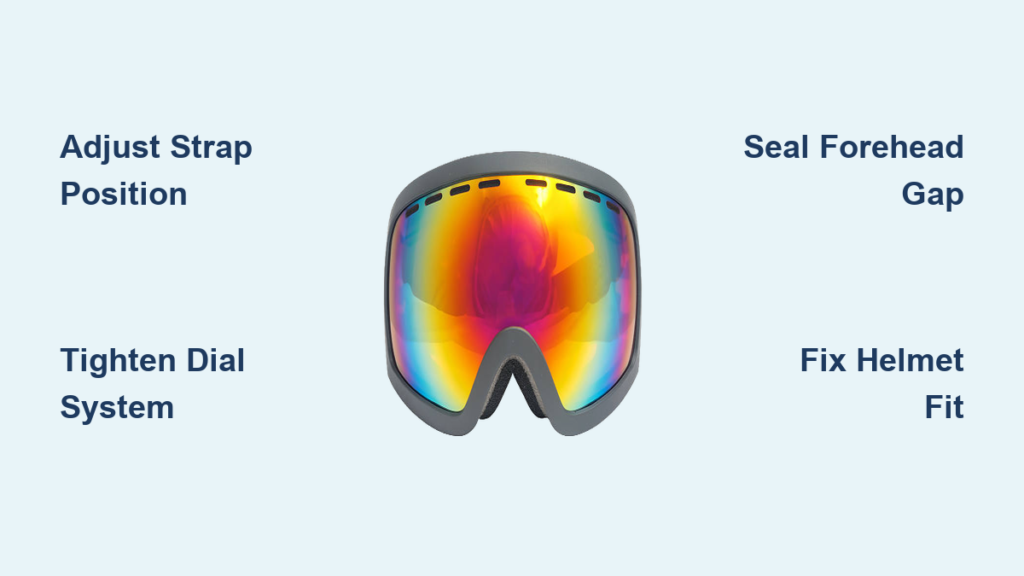
Diagnose Your Goggle Fit Failure Points
Don’t tighten blindly—first identify why your goggles won’t stay put. Stand before a mirror wearing your goggles (and helmet if applicable) and perform these checks:
- The Slide Test: Shake your head vigorously. If goggles slip downward, your strap sits too low on your skull, pulling goggles away from your forehead instead of sealing them against it.
- The Light Leak Check: Tilt your chin up toward bright light. Visible slivers of light between your brow and the goggle frame mean cold air is infiltrating, causing instant fogging and snow leakage.
- The Pressure Map: Wear goggles for 60 seconds, then remove them. Red marks on your temples or nose bridge indicate uneven tension—often from misaligned strap clips or compressed foam.
Most fit failures stem from one critical error: treating goggle straps like ski helmet straps. Goggles require crown-of-head tension to pull frames forward against your face, not downward pressure. Ignore this, and you’ll battle gaps all season.
Position the Strap Correctly for Instant Seal Improvement
90% of goggle gaps vanish with proper strap placement. Here’s how to fix it:
- Locate your skull’s apex: Run your fingers from forehead to crown. The highest point (usually 1-2 inches above your ears) is where the strap must anchor.
- Route over helmet correctly: Unbuckle straps and position goggles on your face. Pull straps over your helmet’s top vents, not under the rim. The strap should cross your skull’s apex—not the back of your head.
- Buckle under chin, not helmet: Fasten the clip beneath your chin strap, not over it. This creates upward tension that seals the top frame edge against your forehead.
Warning: If your helmet’s rear vents compress the strap, slide it slightly forward on your helmet. A downward-pulling strap is the #1 cause of forehead gaps—no amount of tightening fixes this fundamental positioning error.
Master the Strap Clip Adjustment for Precision Tightening
This hidden dial solves 80% of fit issues but is often misused. Modern goggles (Smith I/O Mag, Oakley Flight Deck, Anon M4) feature micro-adjustment dials—here’s the pro method:
- Set baseline tension: Buckle straps comfortably snug (you should fit one finger between strap and head).
- Engage the dial while wearing goggles: With goggles sealed against your face, rotate the dial clockwise in 1-click increments. Do not pull the strap ends.
- Stop at the “seal point”: After 2-3 clicks, press your palms against the goggle frame. If no air leaks when you inhale sharply through your nose, you’ve hit the sweet spot. Over-tightening causes headaches and lens distortion.
Pro Tip: Dial-adjustment systems shorten the strap evenly across both sides. If goggles still tilt left/right, manually adjust the ladder lock on the shorter side by 2mm increments until symmetry returns.
Close Forehead Gaps That Cause Fogging and Snow Infiltration

That 2mm forehead gap is why your lenses fog instantly. Cold mountain air sneaks in, hits warm breath moisture, and creates a fog barrier. Fix it with these field-ready techniques:
Adjust the Frame Angle Using Strap Tension
Most riders unknowingly tilt goggles downward by pulling straps too tight at the back. Instead:
– Loosen ladder locks completely
– Position goggles so the top frame edge touches your brow bone
– Gradually tighten only the dial-adjustment system until the frame seals flush
– Verify with the “palm test”: Press palms against frame edges—no gaps should appear when you tilt head side-to-side
Revive Compressed Foam for Better Sealing
Old or cheap foam loses rebound, creating permanent gaps. Extend its life by:
– Placing goggles foam-side down on a warm car dashboard for 10 minutes (heat re-expands memory foam)
– Gently rolling foam between palms to redistribute silicone oils
– Warning: Never stretch foam—this permanently damages cell structure
Modify Foam Thickness (For Persistent Gaps)
If gaps remain after strap adjustments:
1. Remove the lens (most snap out with light pressure)
2. Peel back the foam liner near the forehead gap
3. Apply a thin strip of double-sided tape to the frame
4. Press foam back down—adding 0.5mm thickness where needed
Caution: Exceed 1mm and you’ll cause lens distortion. Test with one strip before committing.
Optimize Goggle-Helmet Synergy for No-Slip Security
.png)
Your helmet is part of the goggle system—mismatched gear guarantees slippage. Follow these integration steps:
- Helmet strap clearance: Ensure your helmet’s chin strap sits below the goggle strap buckle. If they overlap, the helmet strap pushes goggles downward, widening forehead gaps.
- Helmet vent alignment: Position goggles so top vents align with helmet forehead vents. This channels warm air away from lenses, reducing fogging by 40%.
- Test for frame pressure: Put on both helmet and goggles. If the helmet rim presses into your brow, loosen helmet straps slightly. Helmet pressure on goggles is the silent gap creator.
Time-Saver: Wear goggles before zipping your jacket. Adjusting straps over bulky collars misaligns tension points.
Fix OTG Goggle Fit Issues for Glasses Wearers

Over-the-glasses (OTG) goggles require unique tightening protocols. Standard adjustments fail when accommodating frames:
Eliminate Pressure Points on Eyewear
- Position glasses temples inside the goggle’s foam channels (not compressed against cheeks)
- Tighten straps until frames feel secure—but never enough to bend your glasses
- If nose pads dig in, shift the entire goggle upward 3mm on your face
Prevent Fogging from Glasses Traps
OTG wearers battle fog where glasses meet foam. Combat it by:
1. Using anti-fog spray on glasses lenses (not just goggle lenses)
2. Opening top vents fully—goggles like Smith ChromaPop OTG have dedicated airflow channels
3. Tucking jacket collar under goggle strap to block warm breath rising from neck
Critical Check: Ensure no part of your glasses frame presses against the goggle lens. Even 1mm contact causes permanent pressure fog rings.
Maintain Your Goggle Fit All Season Long
Tightening isn’t a one-time fix—foam compression and strap stretch demand seasonal upkeep:
- After every 5 days on snow: Loosen ladder locks completely, let straps hang for 24 hours to reset elasticity
- Mid-season foam refresh: Wipe foam with 70% isopropyl alcohol on a microfiber cloth—removes oils that degrade seal integrity
- End-of-season storage: Store goggles without lenses in a cool, dark place. Heat and UV exposure permanently harden foam
When adjustments stop working, inspect for these failure signs:
– Straps stretching beyond adjustment range (replace every 2 seasons)
– Foam that no longer rebounds when pressed (replace foam kits cost $15-$25)
– Frame warping from heat exposure (goggles left in hot cars)
A perfectly tightened goggle should feel “forgotten”—no pressure points, no slippage, and zero light leaks. If you still battle fog after these fixes, your lens anti-fog coating is depleted; treat it with a dedicated solution like Cat Crap. Now hit the slopes with confidence knowing your vision stays clear from first chair to last call.

